Complete a mold inspection and issue the report
Record findings with their next steps and photos, check the inspection report and the client's action plan, issue the report, and add a dated addendum if something changes. About 15 minutes.
Watch it (2:38, no sound)
- A mold inspection job (see Start an inspection job, and choose Mold inspection).
- Your moisture readings entered on Moisture readings, and your photos uploaded on Photos & files with their room and caption (see Keep the drying log and Upload photos and documents to a job).
- To issue: you must be the company owner, with every entry from your phone or tablet uploaded.
Step by step
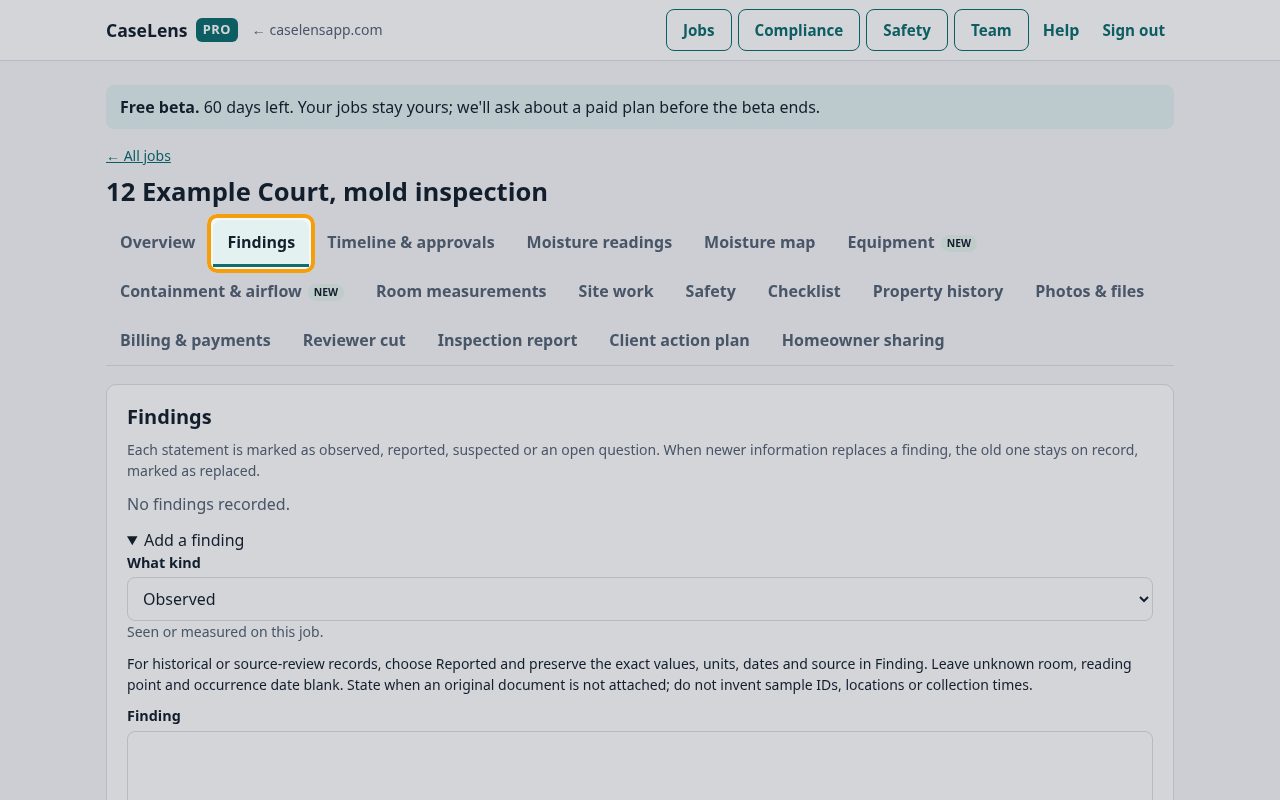
1Open Findings
Open the job and click Findings, beside Overview. After saving Job details, Continue to findings reaches the same open Add a finding form. Each finding is marked as observed, reported, suspected or an open question, and the report is built from them. For historical readings or lab information, choose Reported, retain exact source values and units, and state when an original document is not attached. Unknown identifiers stay blank; structured empty sections do not rule out source-reported records.
2Add what you saw
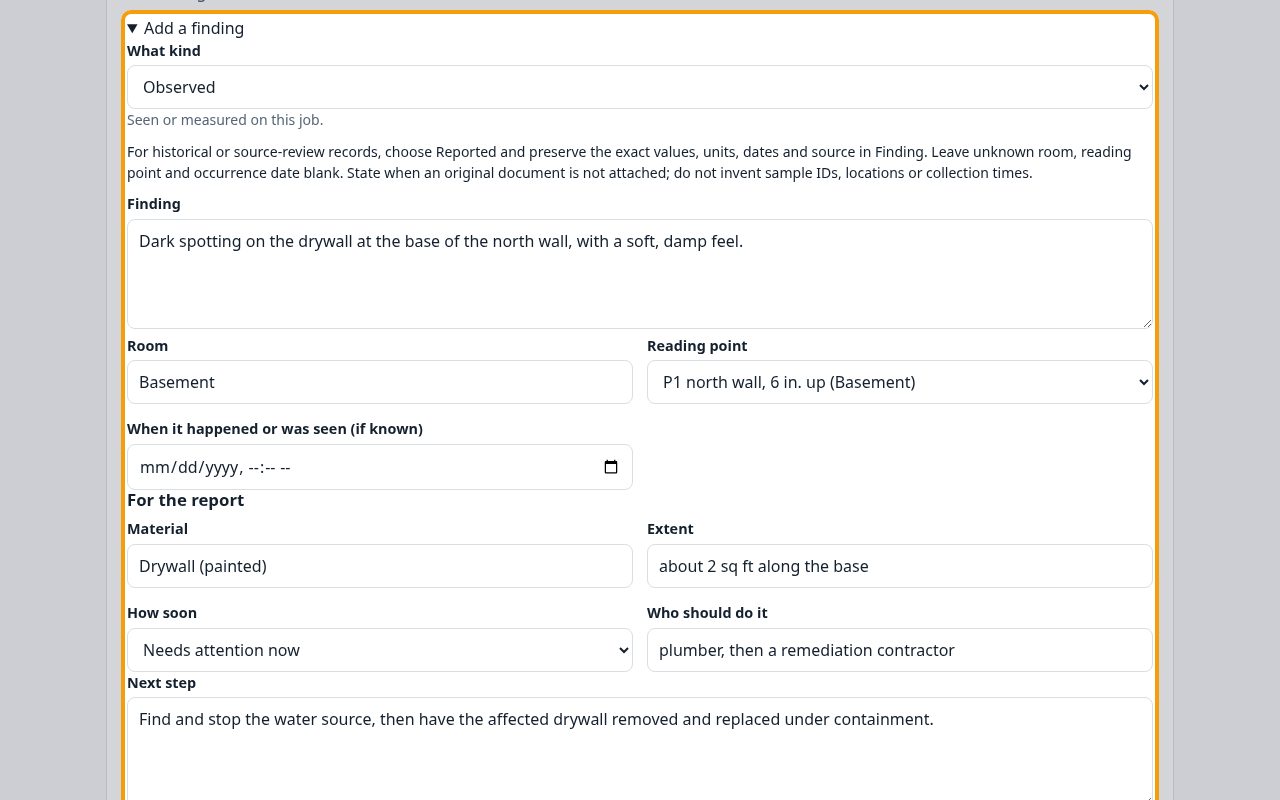
In the open Add a finding form, set What kind to Observed, describe what you saw under Finding, and add the Room and the Reading point that goes with it. Fill in Material and Extent, choose How soon (Needs attention now, Needs attention soon, Keep an eye on it or For information; no action needed), write the Next step and Who should do it, and tick the photos that show it. Click Add finding.
Tip: Who should do it names a trade, not who is at fault or who pays.
3Keep suspected causes and questions separate
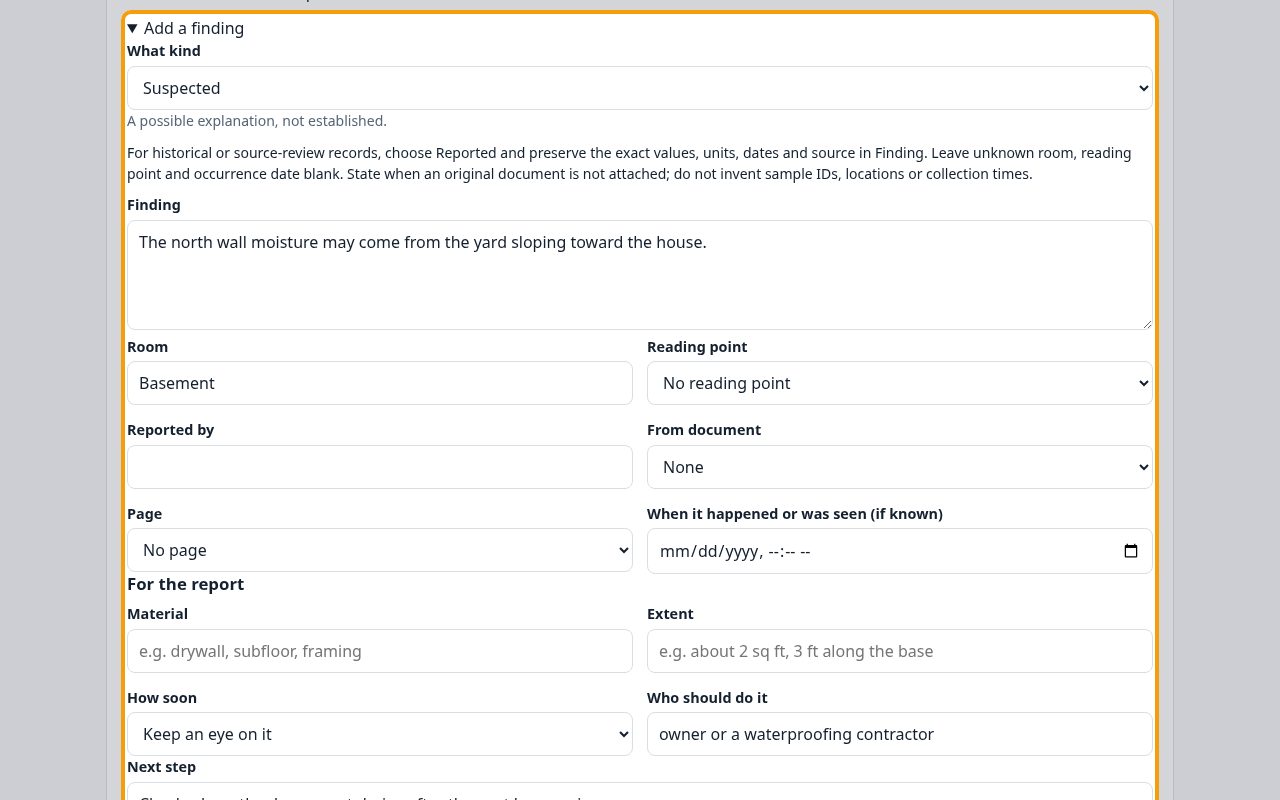
Use What kind to keep things apart: Reported for what someone told you (with Reported by), Suspected for a likely cause you haven't confirmed, and Open question for something still unknown. The report prints a suspected cause as "a possible explanation, not established", and an open question has no next step.
4Record a sample, even before the lab answers
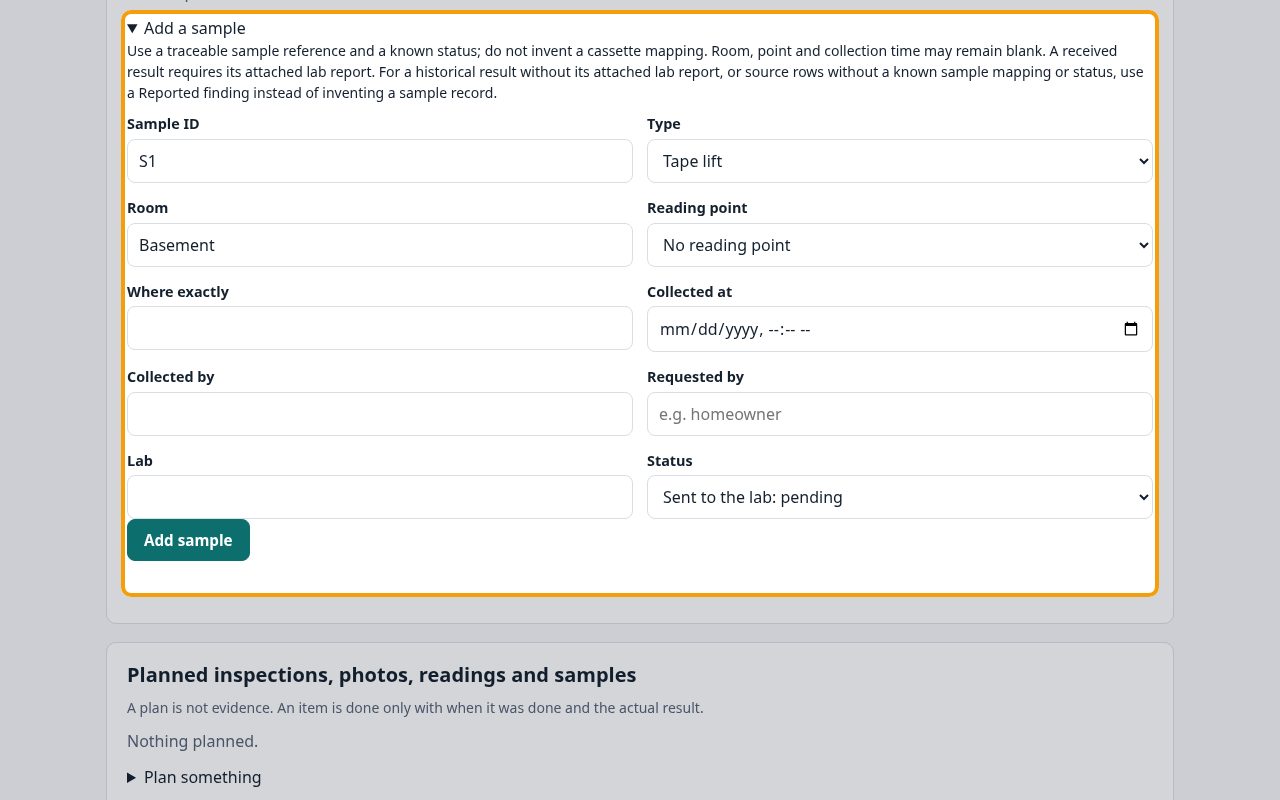
Under Samples and lab reports, click Add a sample. Enter the Sample ID from the lab form, the Type and the Room, and set Status to Sent to the lab: pending until the result arrives. Click Add sample. For historical results without an attached original lab report, or without a known sample mapping or status, keep the exact information in a Reported finding instead. A known sample can stay pending until the lab answers. Leave unknown room, point and collection time blank. A pending sample is printed as "No result. Not a negative or clean result."
5Say what you couldn't inspect
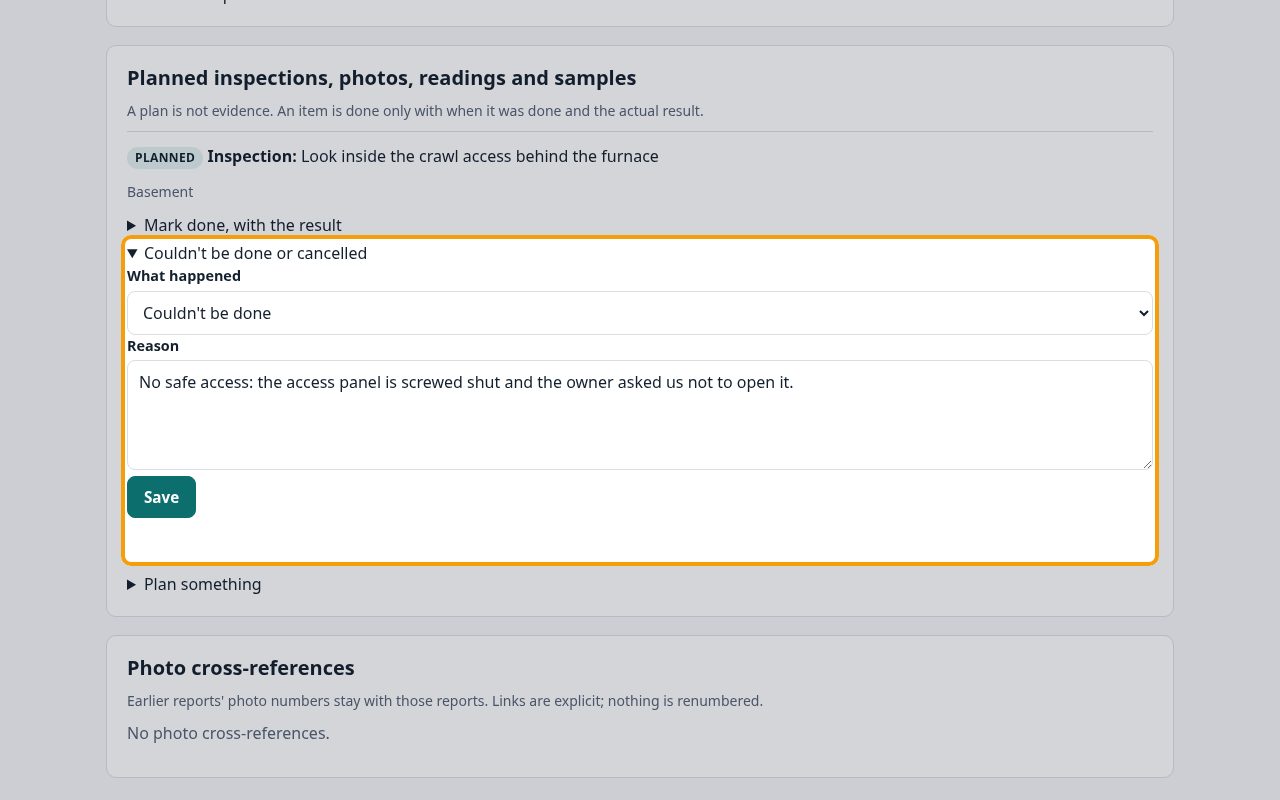
If something planned couldn't be done, find it under Planned inspections, photos, readings and samples (add it with Plan something first), open Couldn't be done or cancelled, leave What happened on Couldn't be done, give the Reason and click Save. The report lists it under areas not inspected, with the reason.
6Read the inspection report
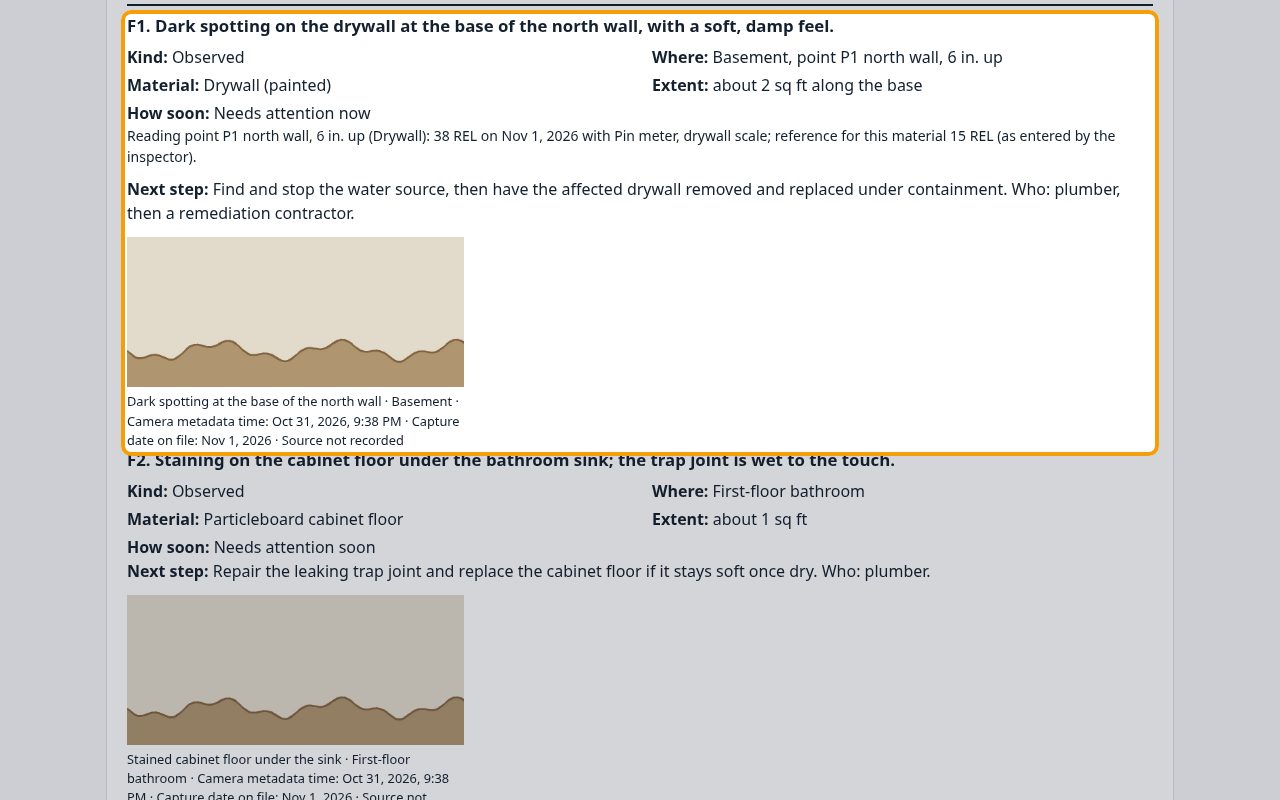
Click the Inspection report tab. It's marked Draft, not issued: agreed scope describes planned work, while findings, readings, samples and files show what is recorded. Missing records do not establish that work was completed or unnecessary; the report keeps pending results and open questions visible. To change something, change the finding on Findings; the report updates.
7Check the review list
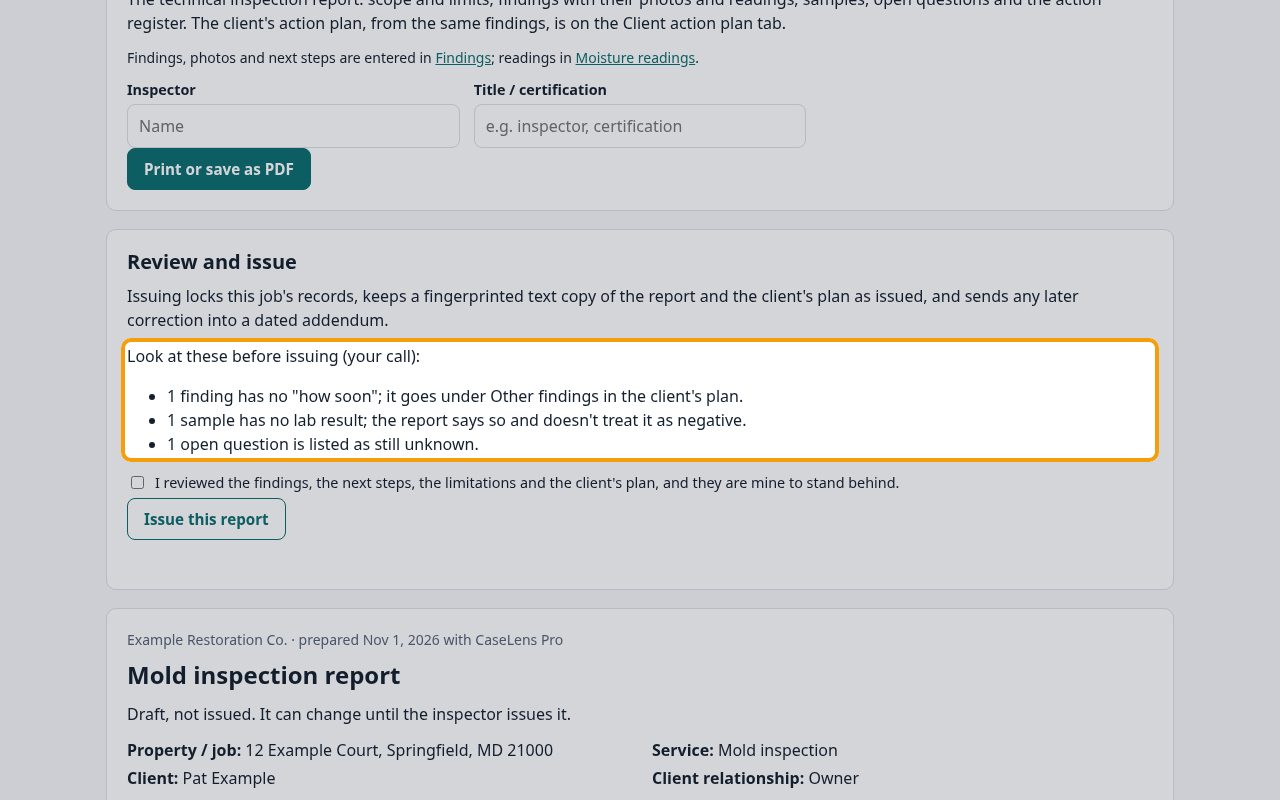
Above the report, Look at these before issuing (your call) lists things to check, such as a sample with no lab result or an open question. They don't stop you issuing; decide whether each one is right for this report.
8Check the client's action plan
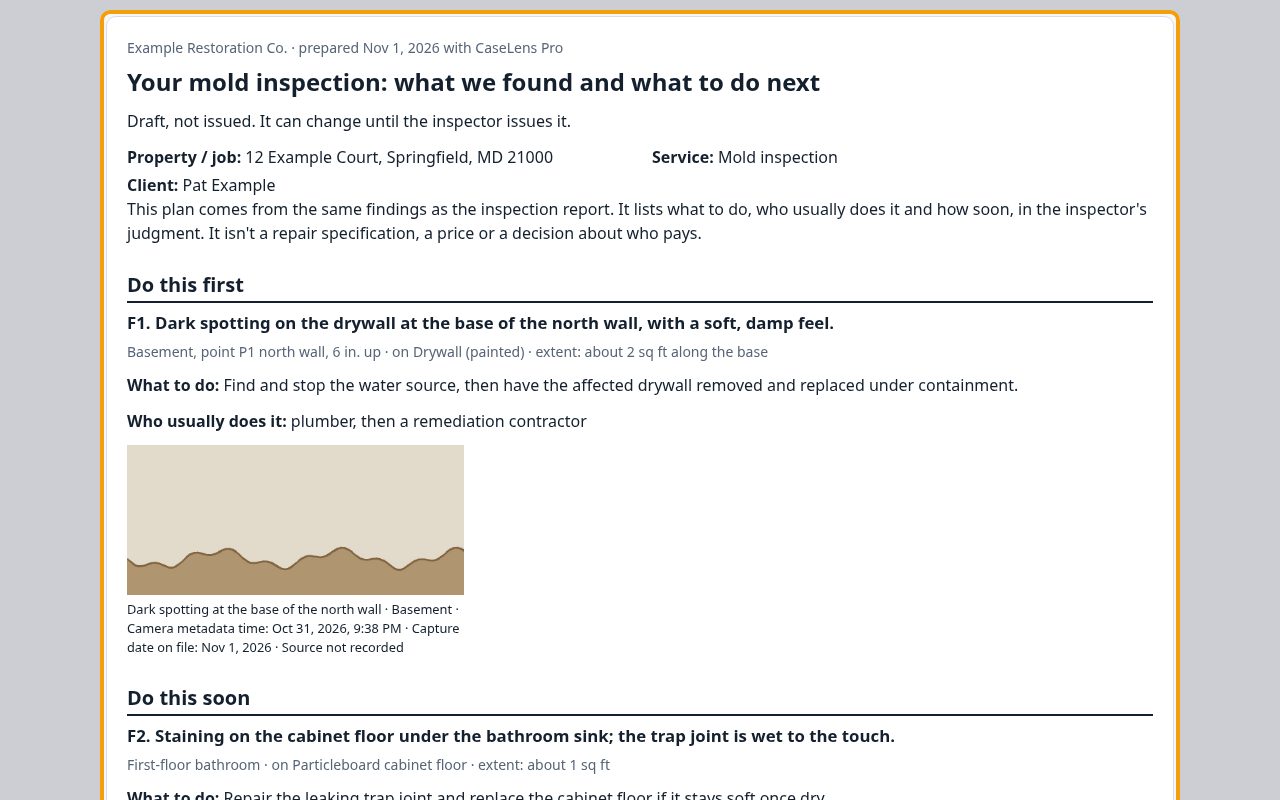
Click the Client action plan tab. It uses the same findings in plain words, grouped into Do this first, Do this soon and Keep an eye on, with what is still unknown and what you couldn't check. Billing files and internal notes are left out. Click Print or save as PDF to give it to the client.
9Issue the report
Back on Inspection report, type your name under Inspector and your Title / certification. Tick I reviewed the findings, the next steps, the limitations and the client's plan, then click Issue this report and click again to confirm. Issuing locks the job's existing records and keeps a fingerprinted text copy of the report and the plan as issued.
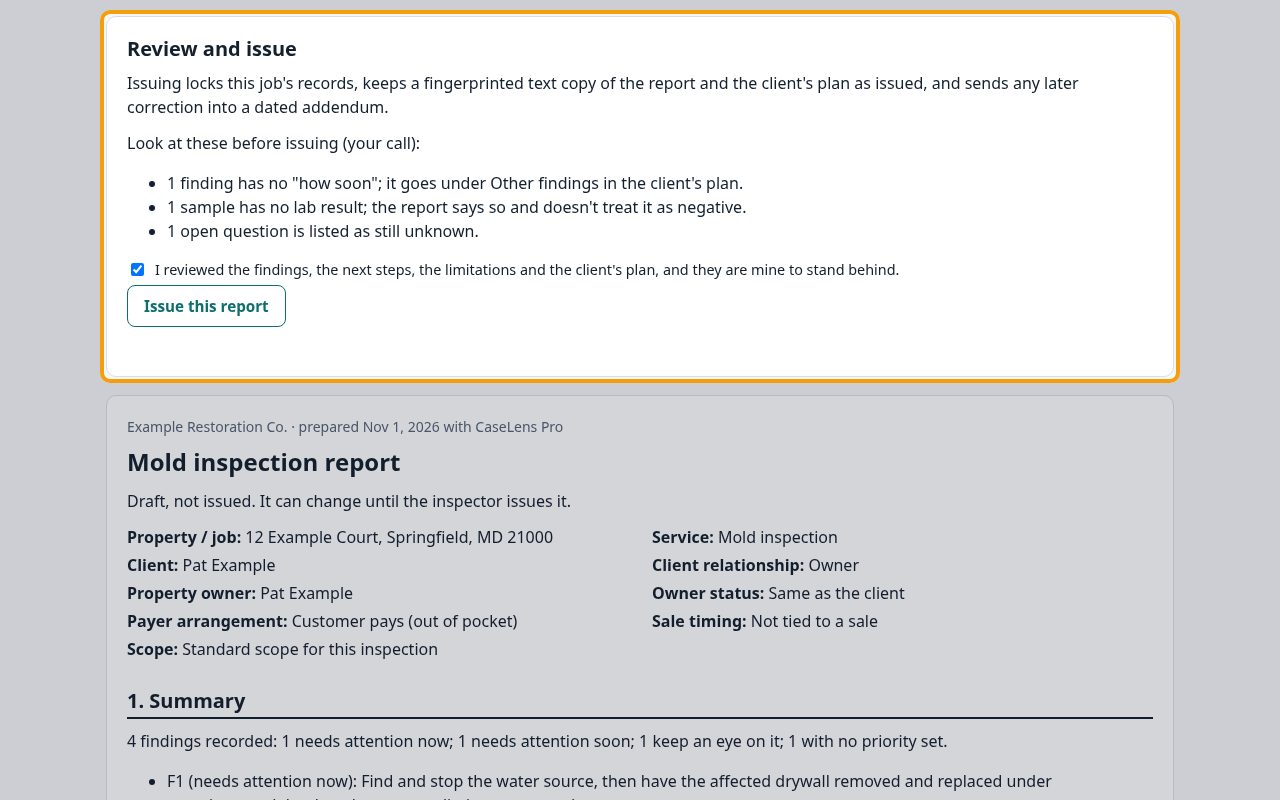
10What issuing changes
The report now says Issued with the date and the fingerprint of the kept copy. Existing findings, readings and photos on the job can't be changed or deleted, and the job can't be deleted. You can still add new entries; anything added later is labeled Added after issue and isn't part of the issued text.
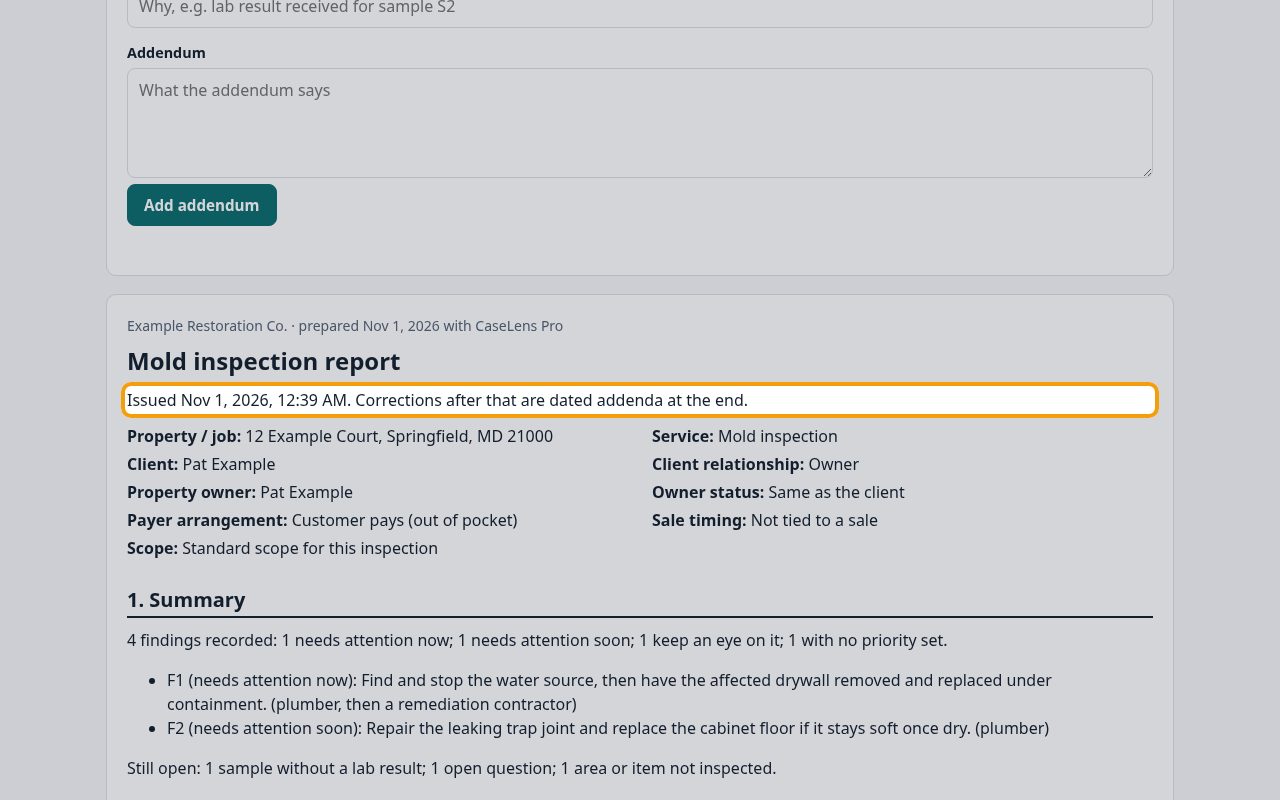
11Add an addendum to correct or update it
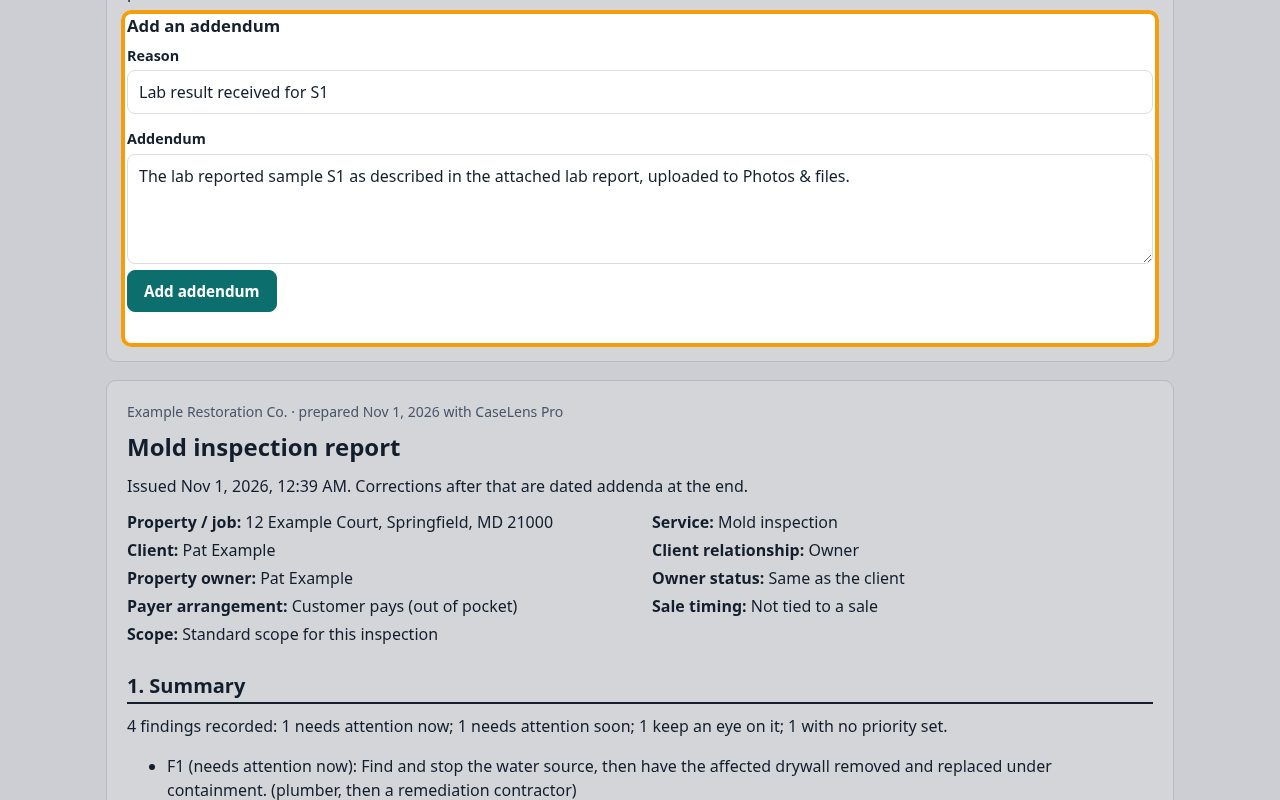
To correct something or add news such as a lab result, fill in Reason and Addendum under Add an addendum and click Add addendum. Each addendum is dated, shows who added it and prints with the report. Print or save the PDF again so the client gets the version with the addendum.
If something goes wrong
- Issue this report can't be clicked
- Read the list above it. Entries saved on this device but not uploaded yet, or a job opened from the copy saved on this device, stop issuing: connect, let them upload (or click Upload now) and reload. Entries on someone else's phone aren't visible here, so ask your team to upload theirs first.
- "Tick the review box first"
- Tick I reviewed the findings, the next steps, the limitations and the client's plan, then click Issue this report again.
- There's no Issue this report button
- Only the company owner can issue a report. Ask the owner to sign in and issue it.
- I need to change a finding after issuing
- You can't change it. Add an addendum that states the correction and why, or add a new finding (it's labeled Added after issue).