Upload photos and documents to a job
Add job photos with their room and caption, plus reviewer reports, written approvals and receipts, so each one is dated and fingerprinted. About 5 minutes.
Watch it (2:21, no sound)
- A job already created in CaseLens Pro.
- The photos and documents on the device you're using (phone, tablet or computer). Photos up to 25 MB each, videos (MP4, MOV or 3GP) up to 50 MB.
- For each photo: the room it was taken in and a few words on what it shows.
Step by step
1Open Photos & files
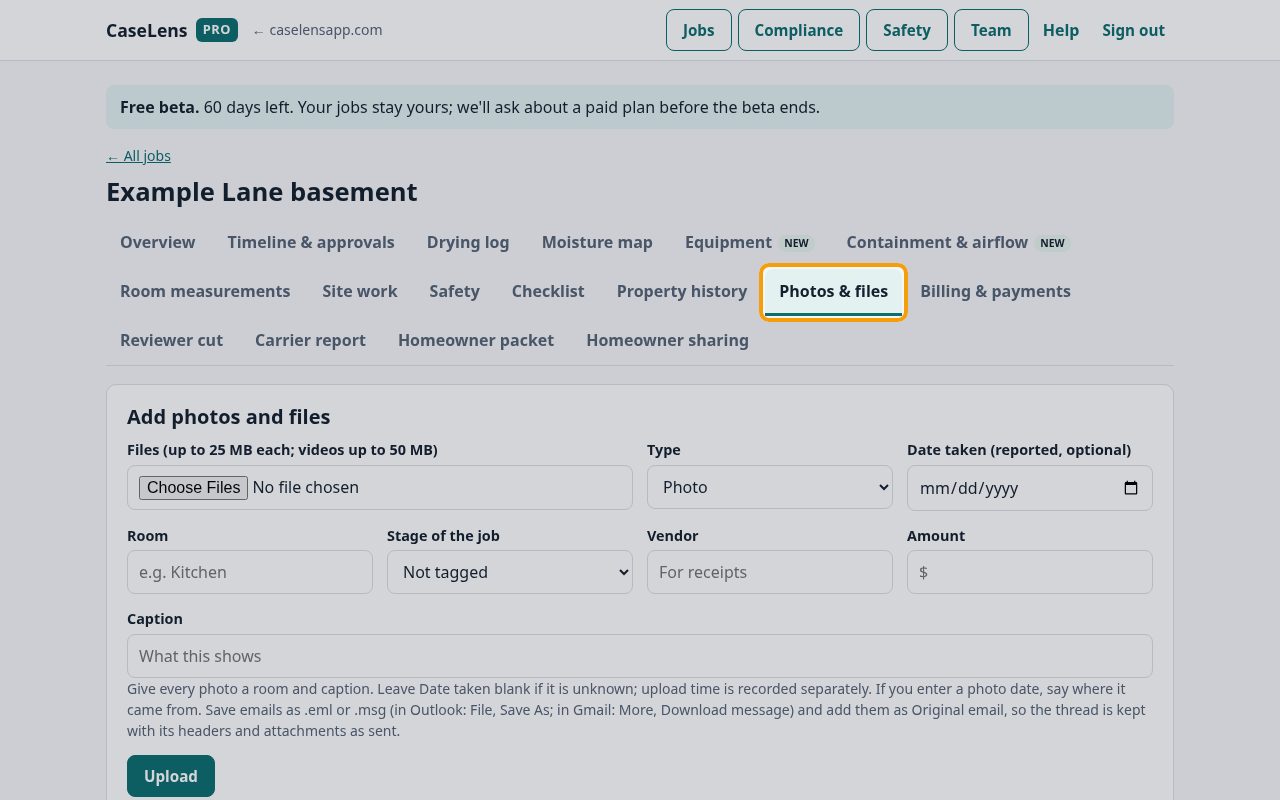
Open the job from Jobs and click the Photos & files tab. The Add photos and files form opens under the tabs; everything already uploaded is listed below it.
2Choose the files
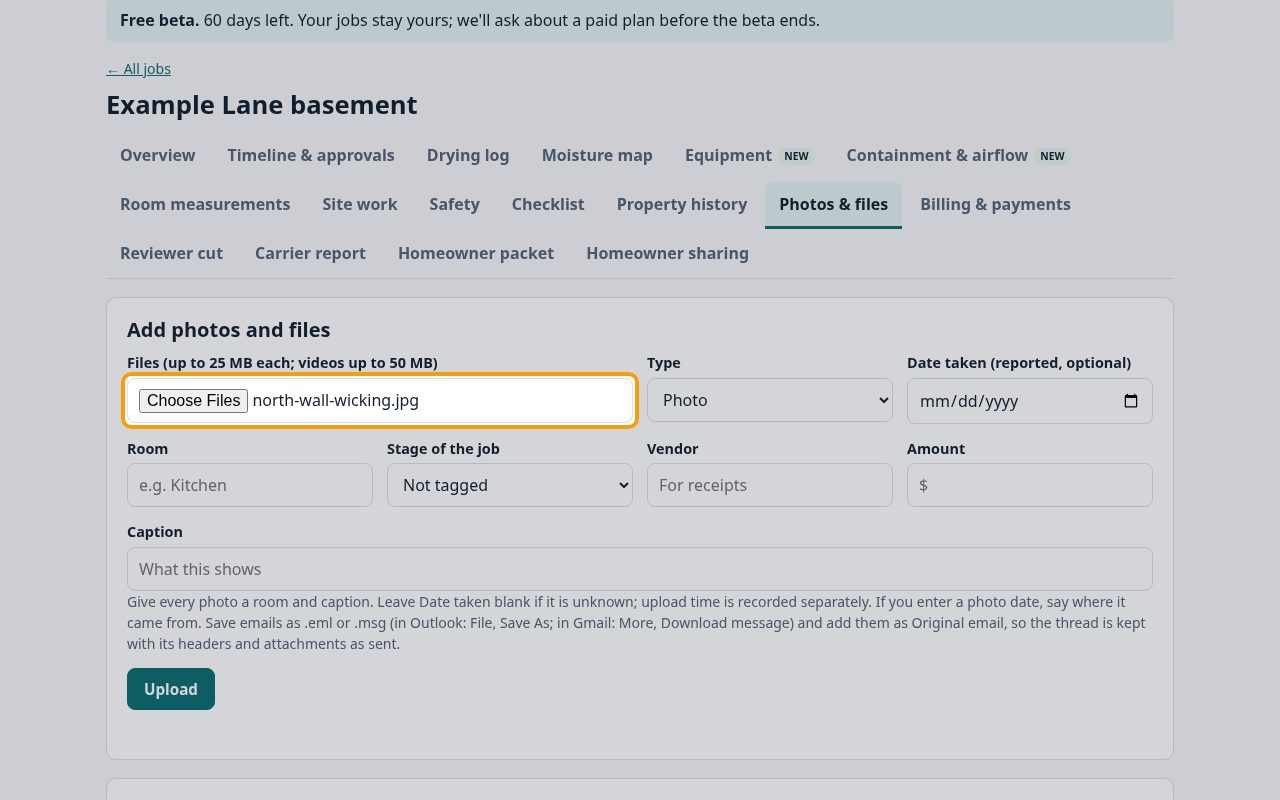
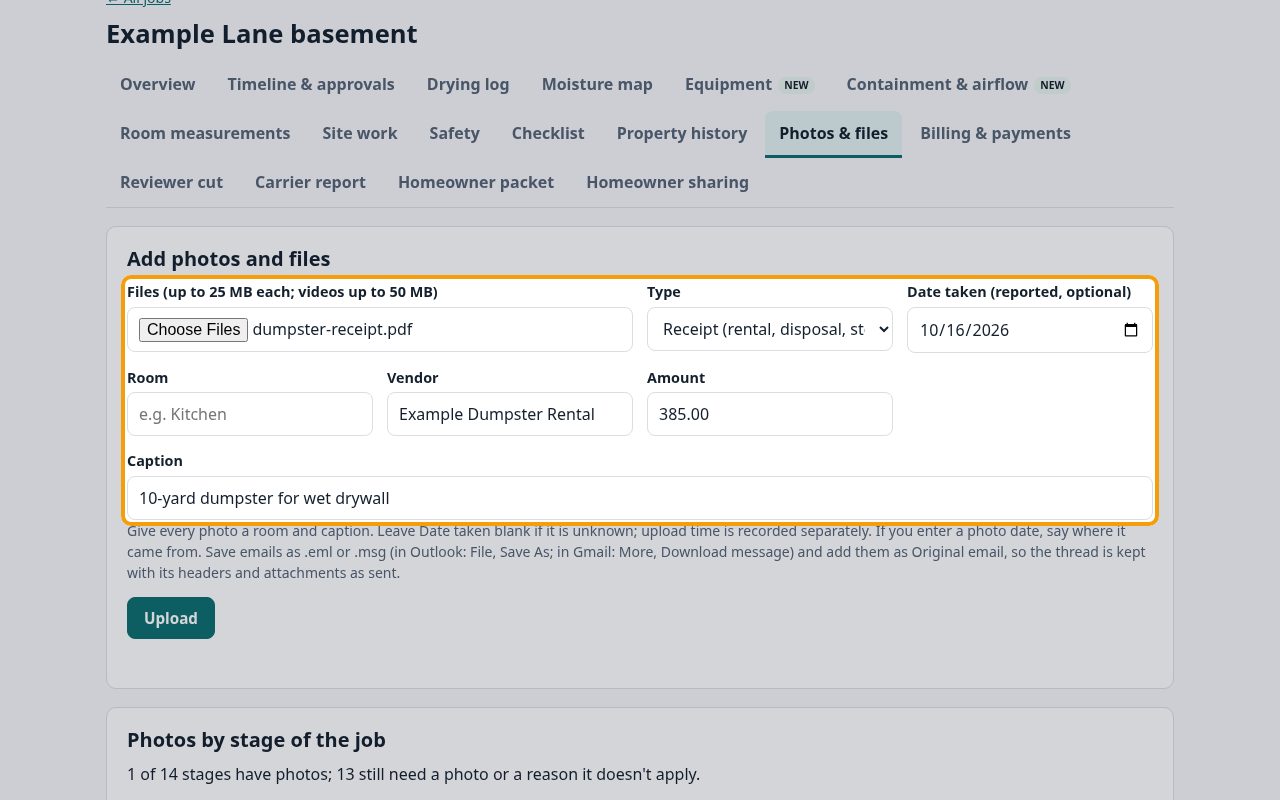
Click the button in the Files (up to 25 MB each; videos up to 50 MB) box (on a computer it says Choose Files) and pick one or more photos. On a phone you can choose from your photos or take one with the camera. The file name appears next to the button.
3Add the date, room, stage and caption
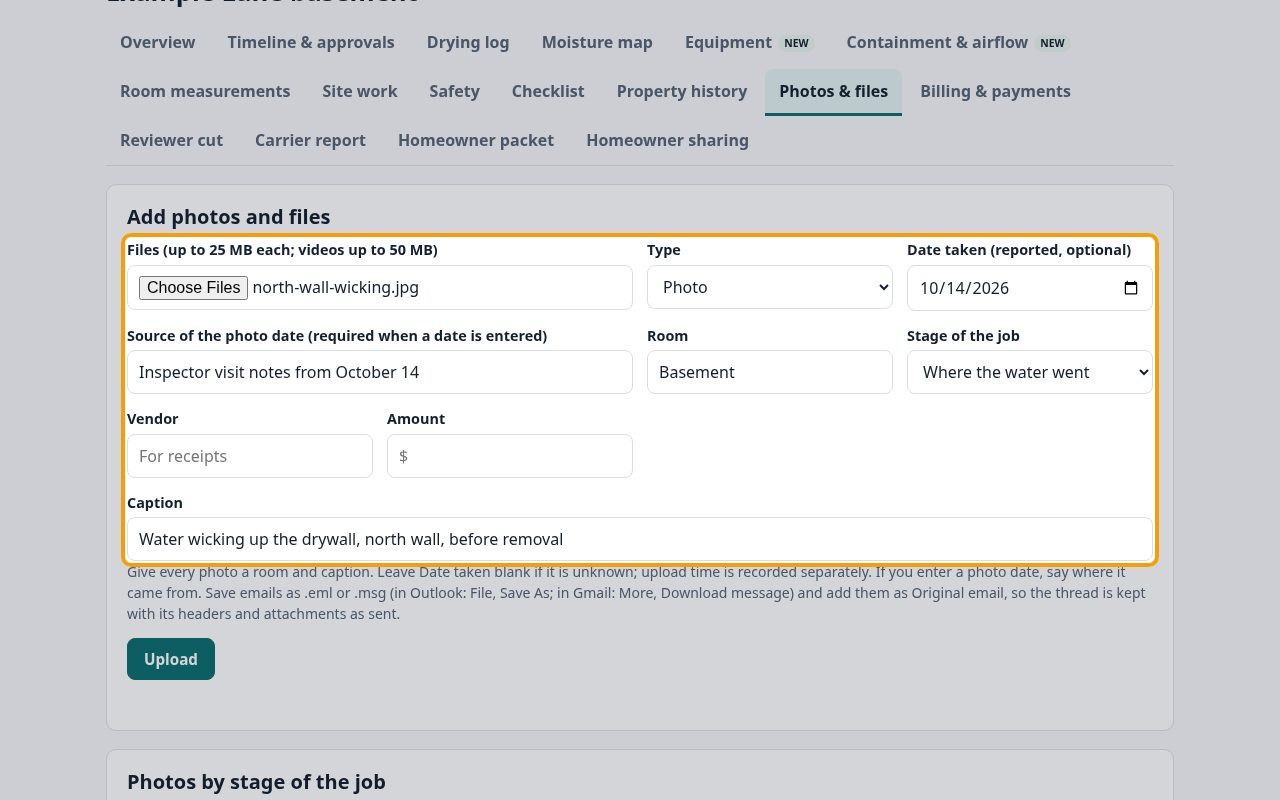
Leave Date taken (reported, optional) blank if the capture date is unknown. If you know the date, enter it and give the Source of the photo date (required when a date is entered), such as your visit notes. The upload time is recorded separately. Type the Room, pick the Stage of the job the photo shows (here Where the water went), and write a Caption saying what the photo shows, for example "Water wicking up the drywall, north wall". Be exact: if the meter is in the sill plate, say sill plate, not wall. Leave Vendor and Amount empty for photos.
Tip: The date, room and caption apply to every file you picked, so upload photos from different rooms in separate batches.
4Upload and check the details
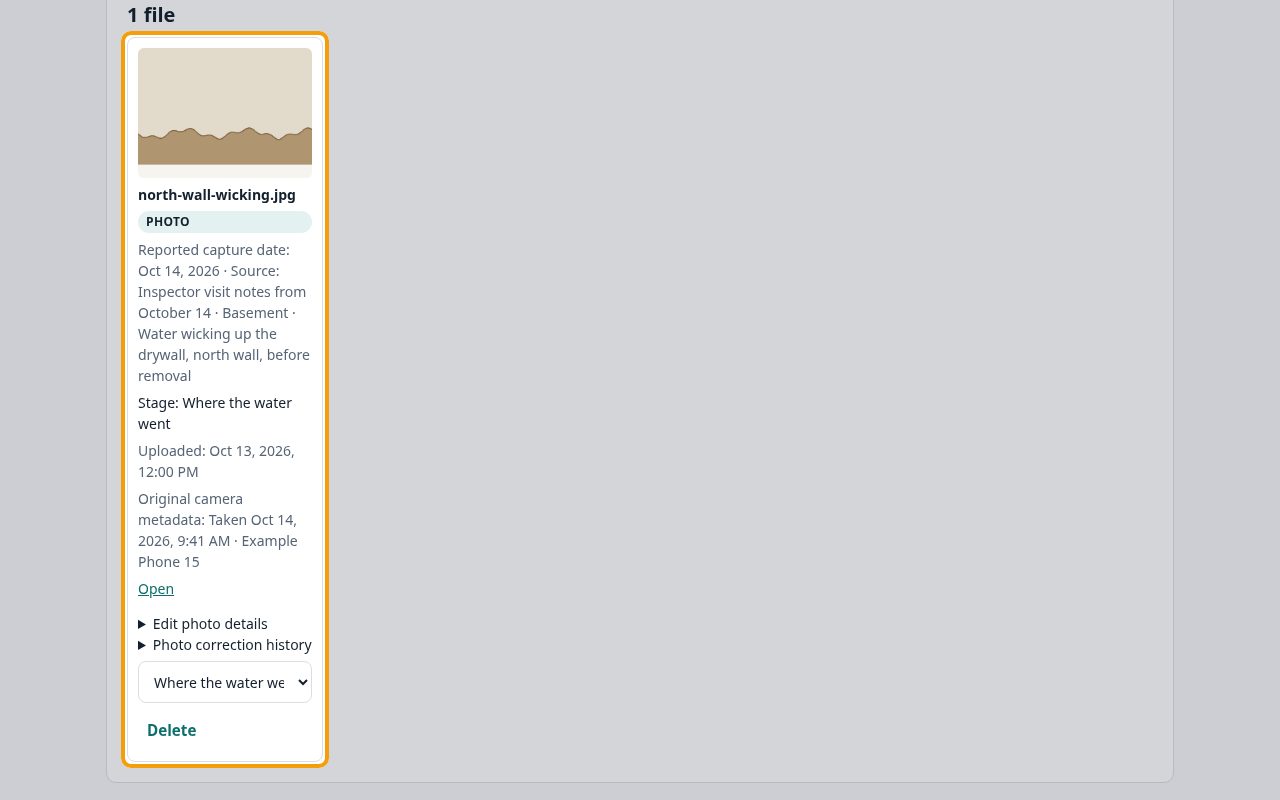
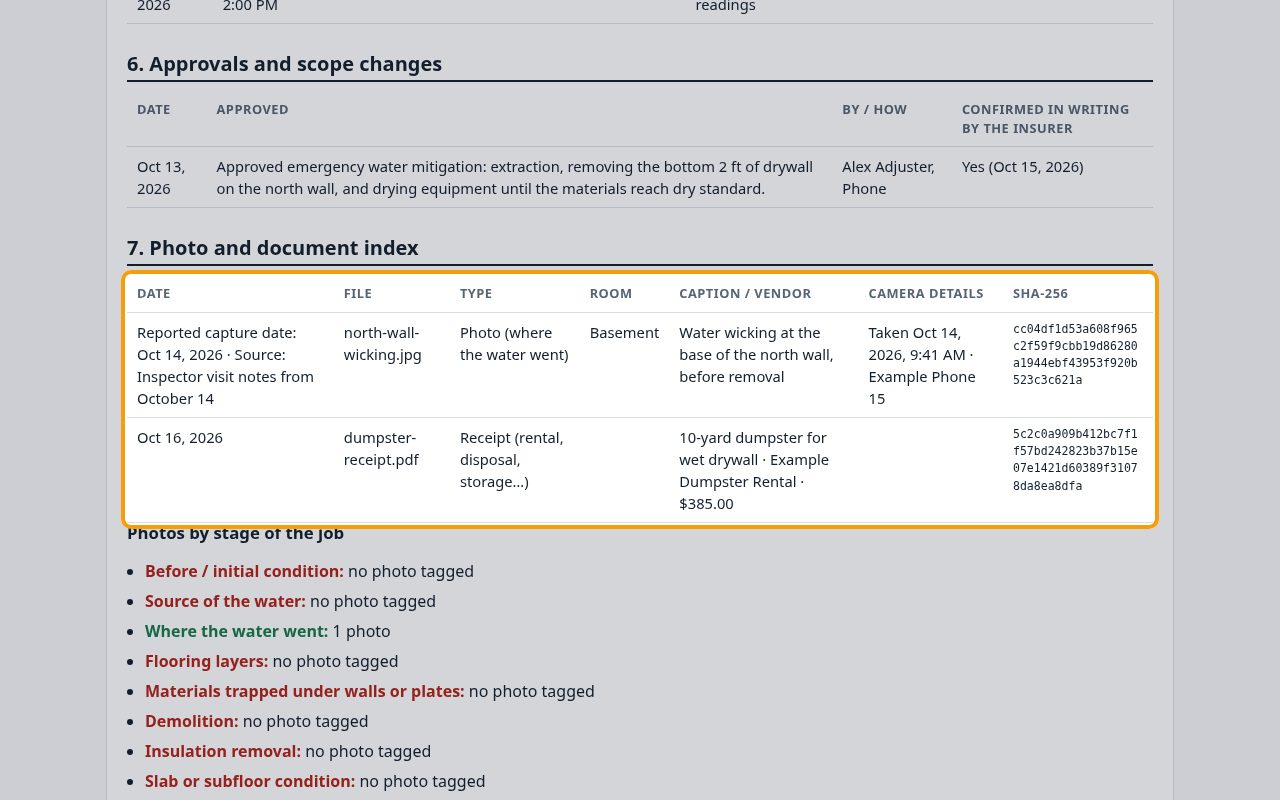
Click Upload. You'll see Uploading 1 of 1…, then the photo appears in the list with its type, reported capture date and source, room, caption and separate upload time. The original camera metadata line is what the photo file itself says: when it was taken, the GPS position if the phone saved one, and the camera (here Example Phone 15). Those details are read once at upload and can't be edited. A screenshot or a photo sent through some messaging apps says No camera details in the file.
5Correct a photo description
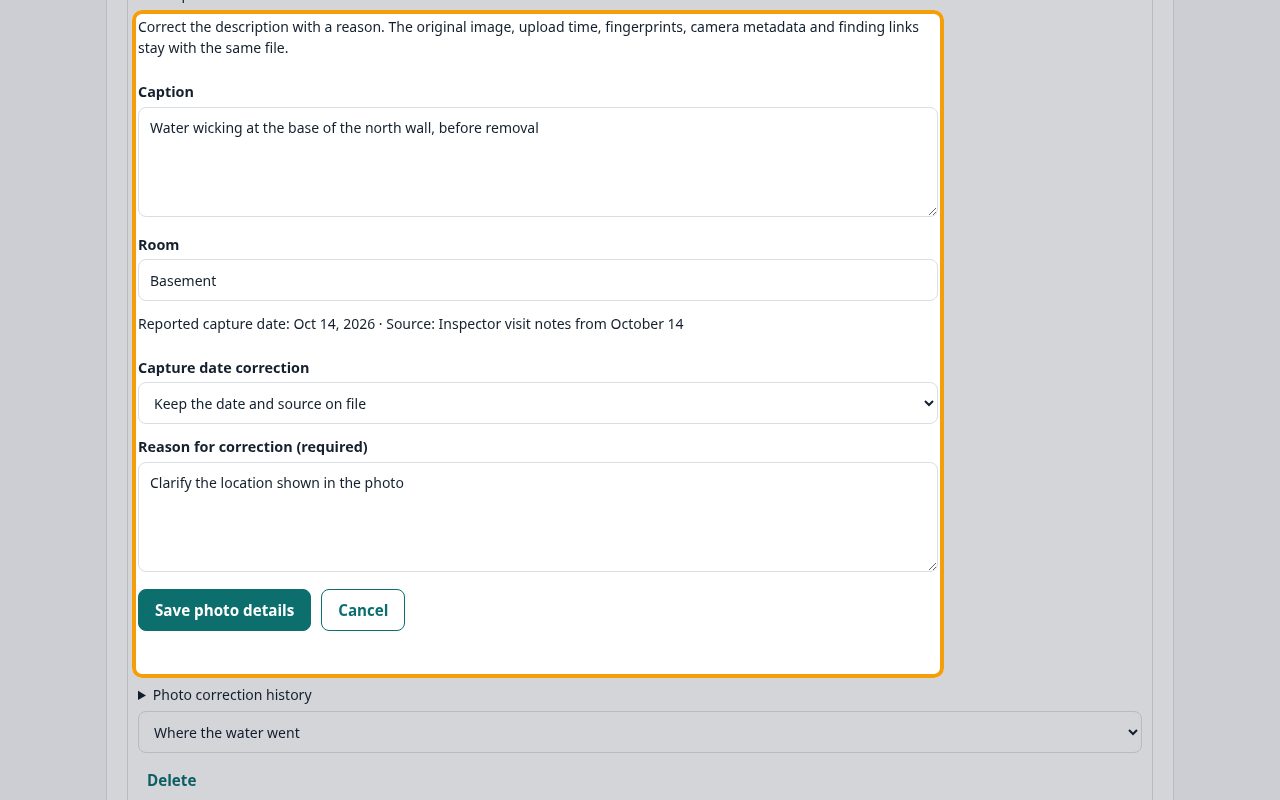
Under the photo, open Edit photo details. Correct Caption or Room, then give the Reason for correction (required). Keep the date and source on file, correct the reported date with its source, or choose Capture date is unknown. Click Save photo details. The original image, upload time, camera metadata and finding links stay with the same file. Connect first if offline. Issued jobs require a dated addendum.
6Read the correction history
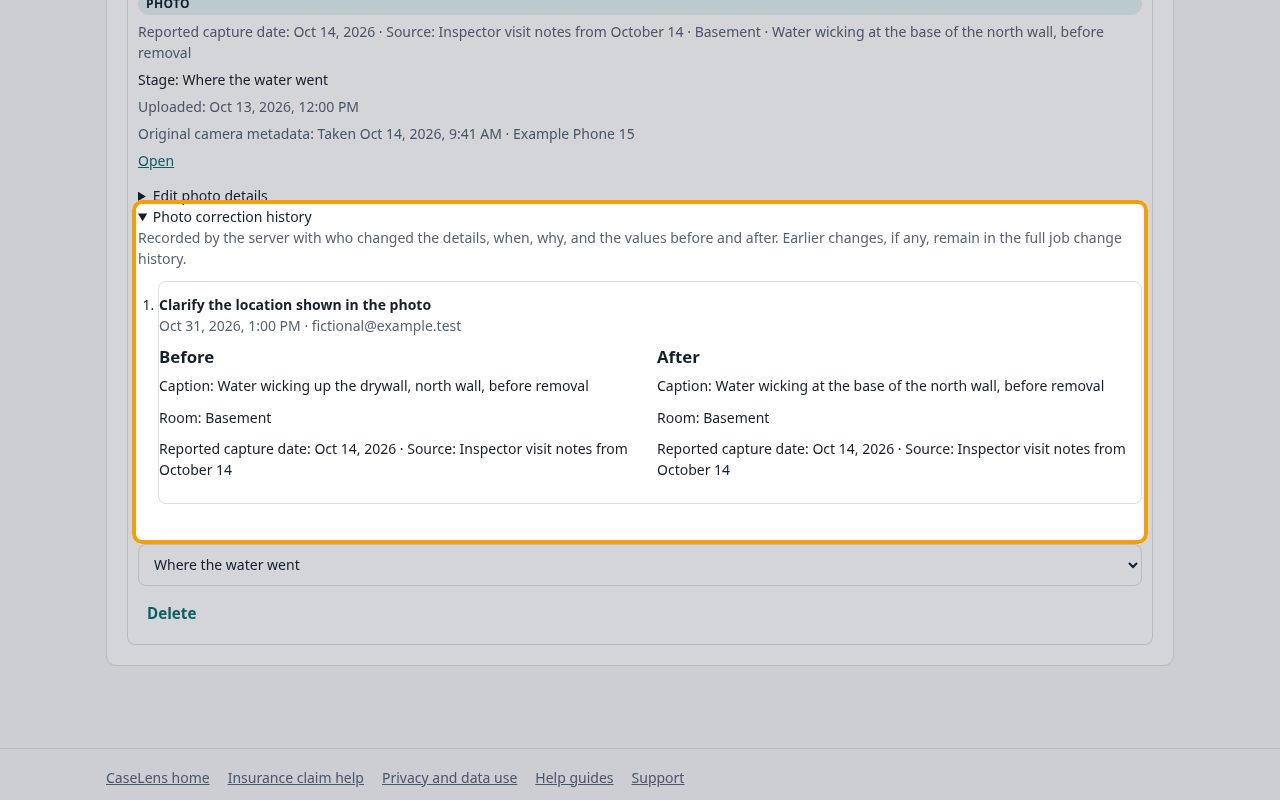
Open Photo correction history beneath the photo to see the reason, account, server time, and Before and After values. Old capture dates stay in that history even when a correction marks the current capture date unknown. Close and reopen the job to read the saved correction. Open still opens the original file; Delete asks for a second click and records the deletion. Once issued, existing files cannot be changed or deleted.
7See which stages still need photos
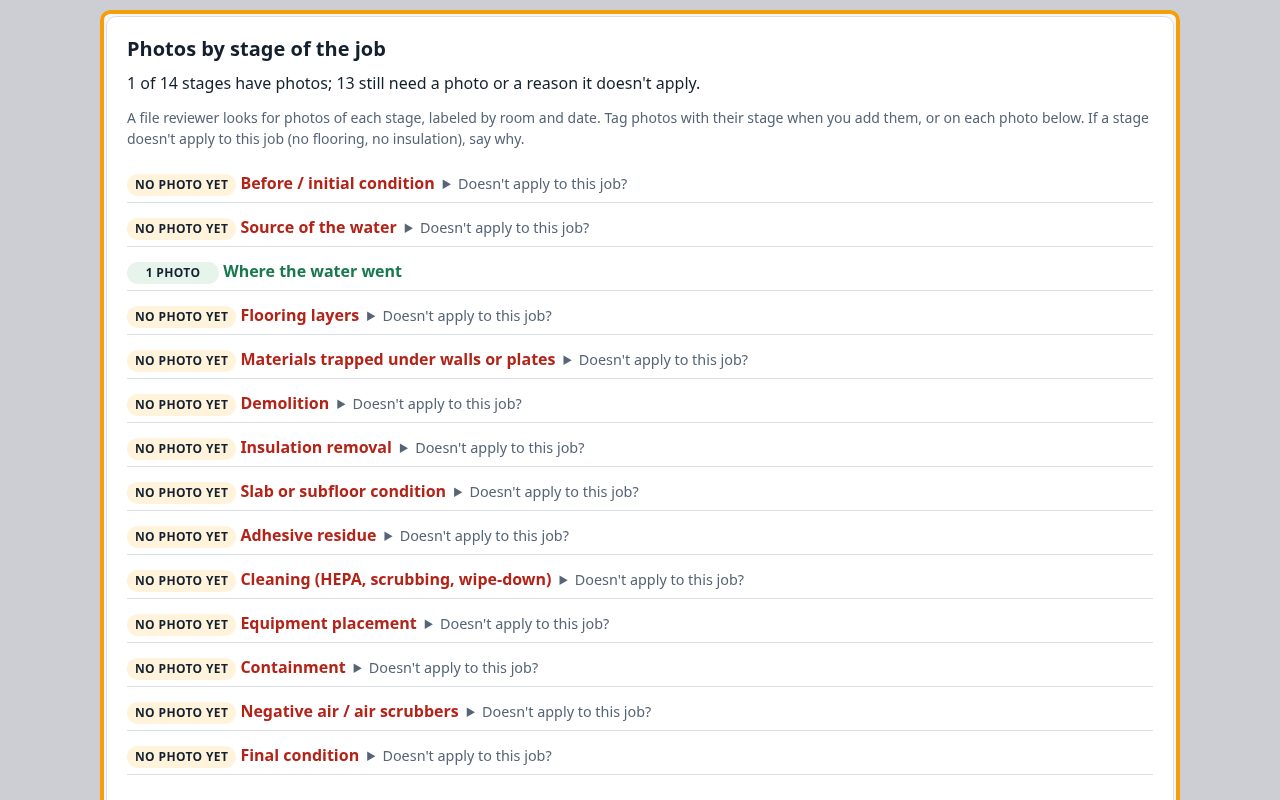
Photos by stage of the job lists the stages a file reviewer looks for, from Before / initial condition to Final condition, and counts the tagged photos for each. A stage with No photo yet needs one, or, if it doesn't apply to this job (no flooring, no insulation), click Doesn't apply to this job?, type why and click Doesn't apply. The same list prints in the carrier report. Restoration jobs only.
8Upload a document
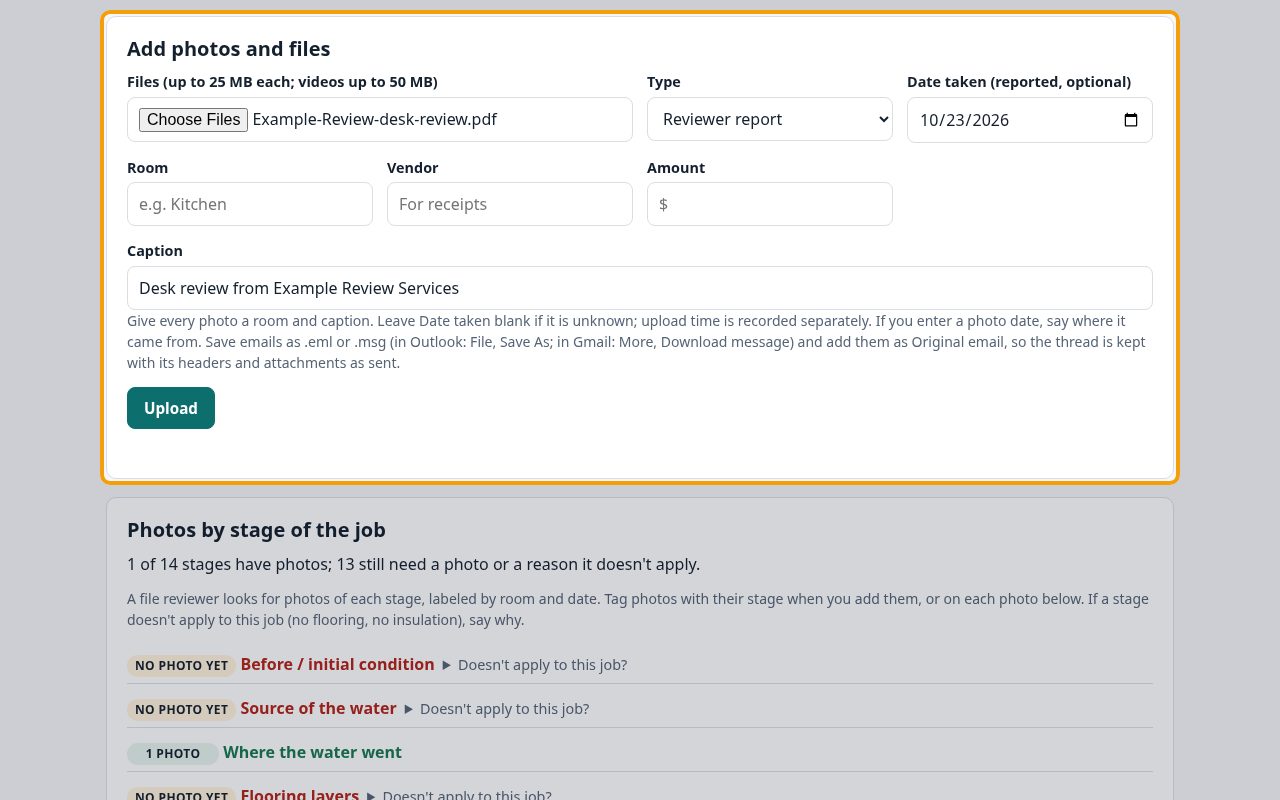
Documents go in the same way. For the reviewer's report: choose the PDF, set Type to Reviewer report, put the date you received it in the Date taken (reported, optional) box, add a caption such as who sent it, and click Upload. Use Written approval for an adjuster's approval saved as a PDF, and Signed work authorization for the signed authorization.
Tip: To keep an email itself, with its headers and attachments as sent, save it as a file (in Outlook: File, Save As; in Gmail: More, Download message) and upload the .eml or .msg file with Type set to Original email (.eml or .msg, kept unchanged).
9Add a receipt with its vendor and amount
For a rental, disposal or storage receipt, set Type to Receipt (rental, disposal, storage…), then fill in Vendor and Amount. Upload receipts one at a time, because the vendor and amount belong to a single receipt. Click Upload.
10What the fingerprint means
When a file is uploaded, the CaseLens server takes its SHA-256 fingerprint: a long code that changes completely if even one dot in the file changes. You'll find it in the SHA-256 column of the Photo and document index on the Carrier report tab, and in the job export. Anyone with a copy of the photo can work out its code and compare: if the codes match, the copy has exactly the same contents as the file CaseLens stored. A fingerprint doesn't show who took a photo or when; dates, their sources, room descriptions and original camera metadata provide separate context; none alone proves when it was taken. Photos, videos, receipts, written approvals and signed work authorizations are always listed (like the dumpster receipt here). Reviewer reports, estimates, documents and other files are listed only if you tick List estimates, reviewer reports and letters in the file index.
If something goes wrong
- "Choose at least one file."
- No file was picked. Click the button in the Files box, pick the files, then click Upload.
- "… is over 25 MB." or "… is over 50 MB, the limit for a video. Trim it on the phone and try again."
- Photos and documents can be up to 25 MB and videos up to 50 MB. Trim the video, or save a large PDF smaller, and upload it again.
- "A vendor and amount belong to one receipt. Upload receipts one at a time."
- You picked several files with a vendor or amount filled in. Pick just one receipt, or clear Vendor and Amount for a batch of photos.
- "Choose Original email as the type for .eml and .msg files."
- You picked a saved email with another type selected. Set Type to Original email (.eml or .msg, kept unchanged) and click Upload again.
- The photo says "No camera details in the file"
- The file had no time, GPS or camera in it (common for screenshots and photos sent through some messaging apps). Upload the original from the phone's camera roll when you can; any reported capture date and its stated source are saved separately. Leave the date blank when unknown.
What's next
- Build, print and finalize the carrier reportMake the drying report for the carrier or reviewer, print it or save it as a PDF, finalize it, and add a dated addendum if something needs correcting. Also: the homeowner packet. About 10 minutes.
- Download the full job recordSave the job's records and every original file as one or more numbered .zip parts, check each part's exceptions, and confirm every part actually saved, for an attorney, appraisal or your own records. About 5 minutes.