Record a property's history: dates, earlier reports and warranty
Write down what earlier documents and people say about the property (key dates, earlier inspection reports, any warranty and what they reported), kept apart from what you saw yourself. About 10 minutes.
Watch it (2:07, no sound)
- A job already created in CaseLens Pro.
- Any earlier report or document you were given, already uploaded on the job's Photos & files tab (see Upload photos and documents to a job).
- Who gave you each document or told you each thing, and when.
Step by step
1Open Property history
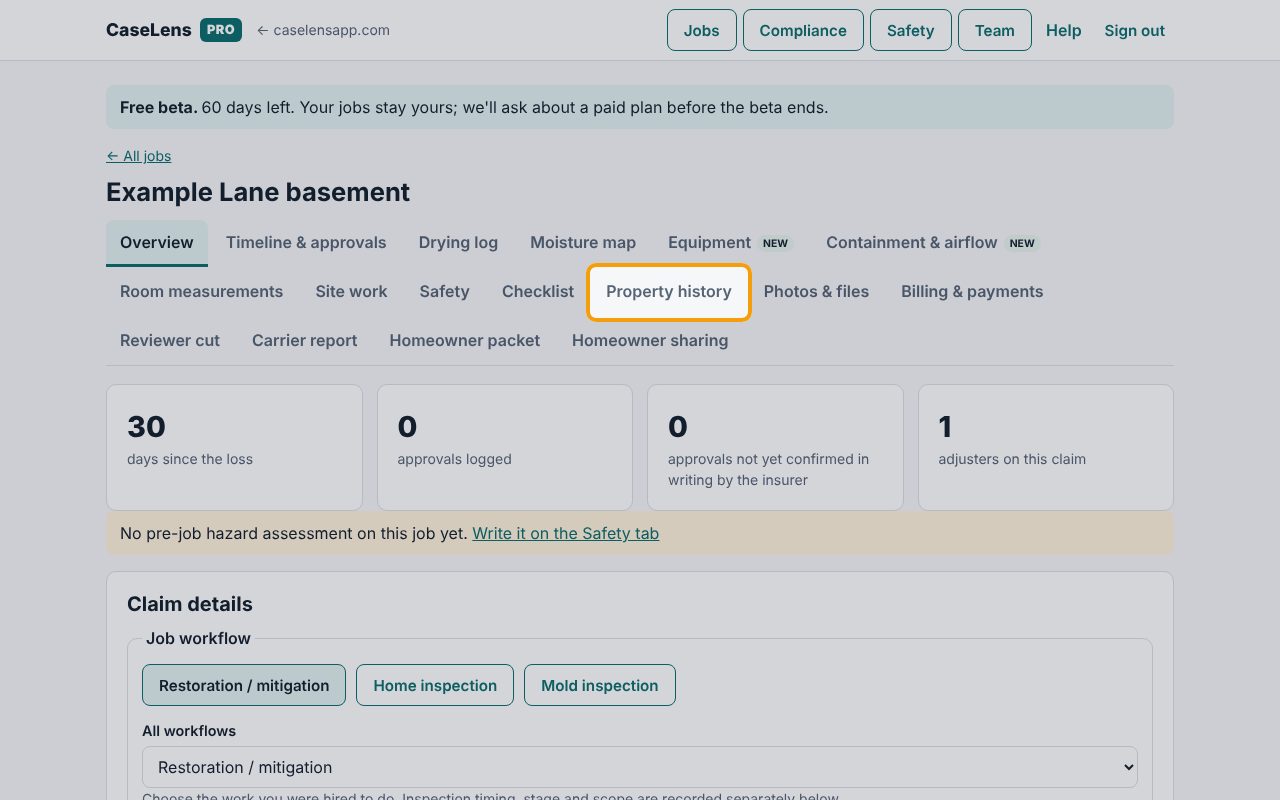
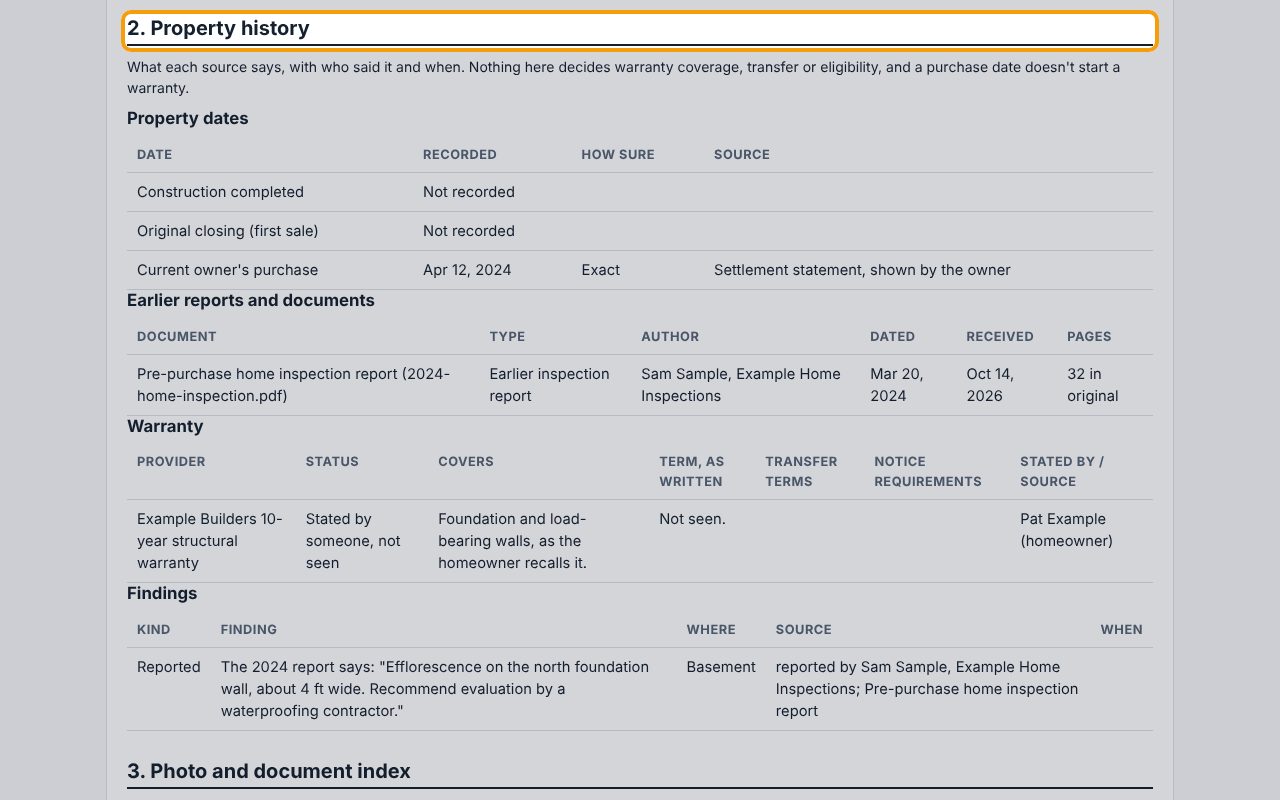
Open the job from Jobs and click the Property history tab. The green box at the top says what this tab is for: it records what each source says. Nothing here decides warranty coverage, and unknown stays unknown.
2Enter the dates you can source
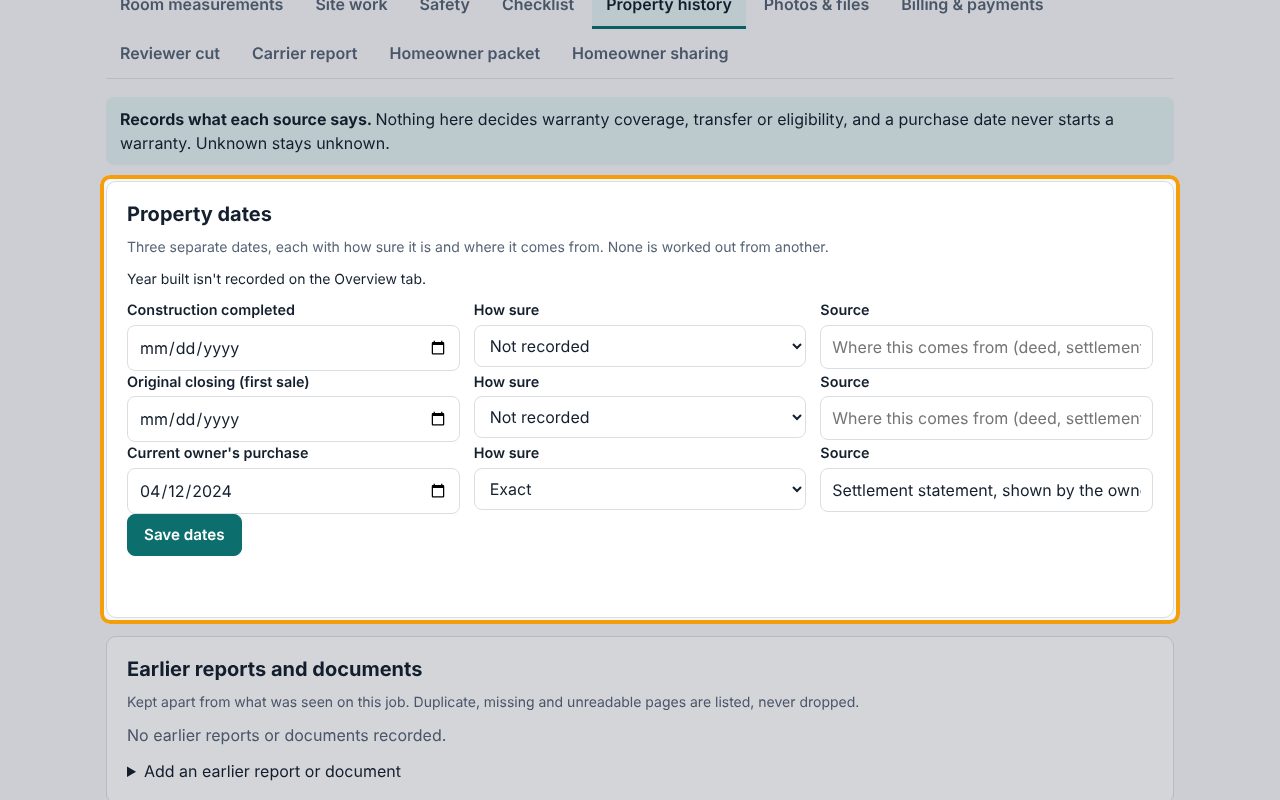
Under Property dates there are three separate dates: Construction completed, Original closing (first sale) and Current owner's purchase. Fill in only the ones you have a source for. For each, choose How sure (Exact, Approximate or Unknown) and type where it comes from under Source, such as the deed or settlement statement. Leave the others blank, then click Save dates.
3Add an earlier report or document
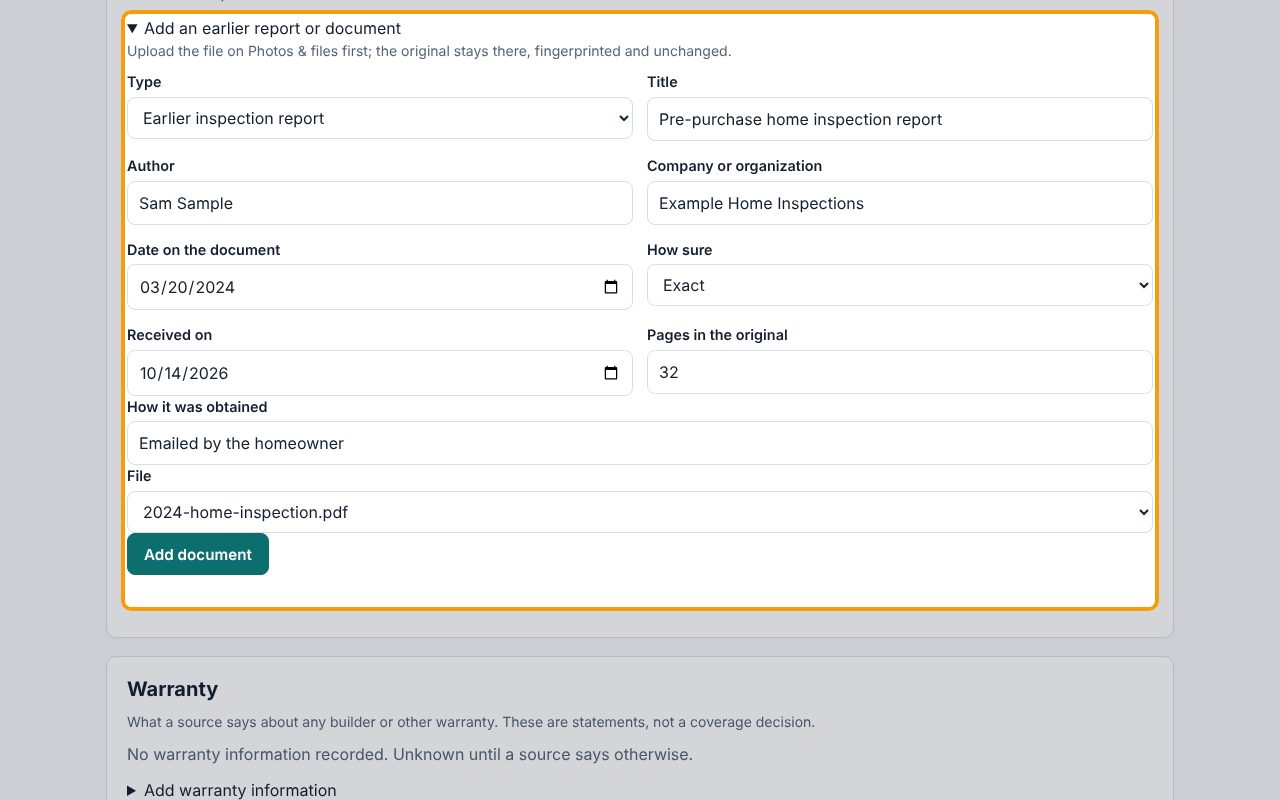
Under Earlier reports and documents, click Add an earlier report or document. Choose its Type, then type the Title, Author and Company or organization as they appear on it, the Date on the document, the day you got it under Received on, the number of Pages in the original and How it was obtained. Under File, pick the copy you uploaded on Photos & files. Click Add document.
4Check the document is listed
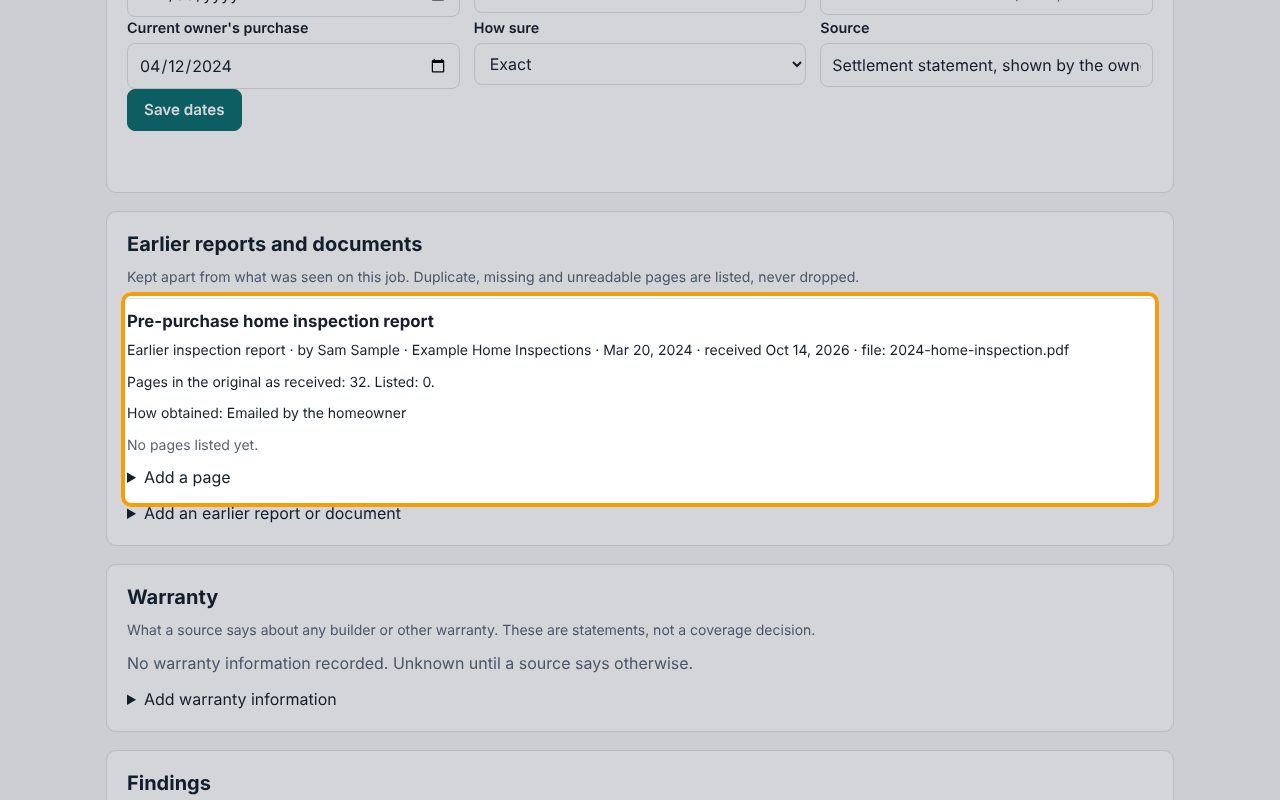
The document now appears with its type, author, date, the day you received it and its file. Pages in the original as received shows the count you typed. Use Add a page to list a page you want to point to, or one that is a duplicate, missing or unreadable, so nothing is quietly dropped.
5Record what you're told about a warranty
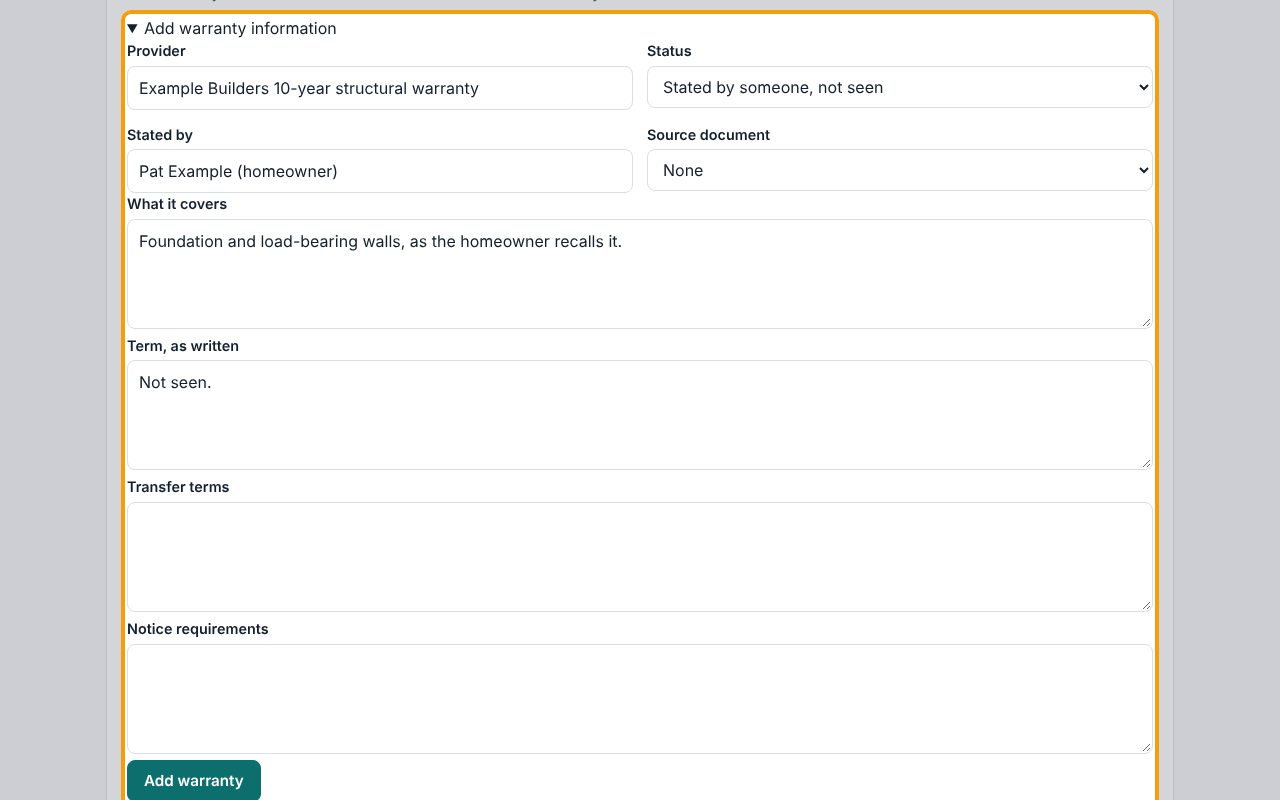
Under Warranty, click Add warranty information. Type the Provider and choose the Status that is true today: Unknown, nothing confirmed, Stated by someone, not seen, Warranty document on file or Document reviewed against these details. Say who told you under Stated by. Under Term, as written, copy the wording; don't turn it into dates. Click Add warranty. This records a statement. It is not a coverage decision.
6Add what an earlier report said
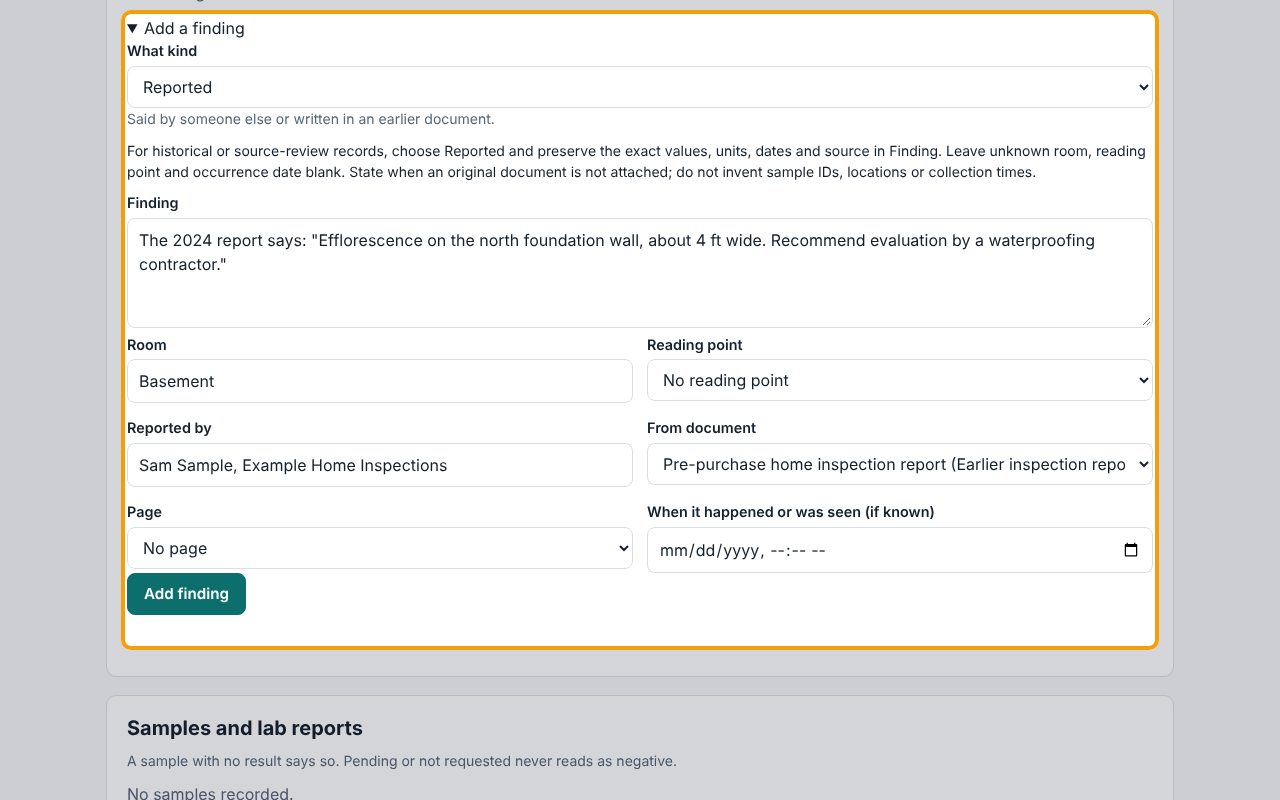
Under Findings, click Add a finding. Under What kind, choose Reported for something said by someone else or written in an earlier document (Observed is only for what was seen or measured on this job; Suspected and Open question are there too). Type the Finding in the source's own words, with its values, units and dates. Fill in Reported by and pick the document under From document. Leave the room or date blank if the source doesn't give them. Click Add finding.
7See how the finding is kept
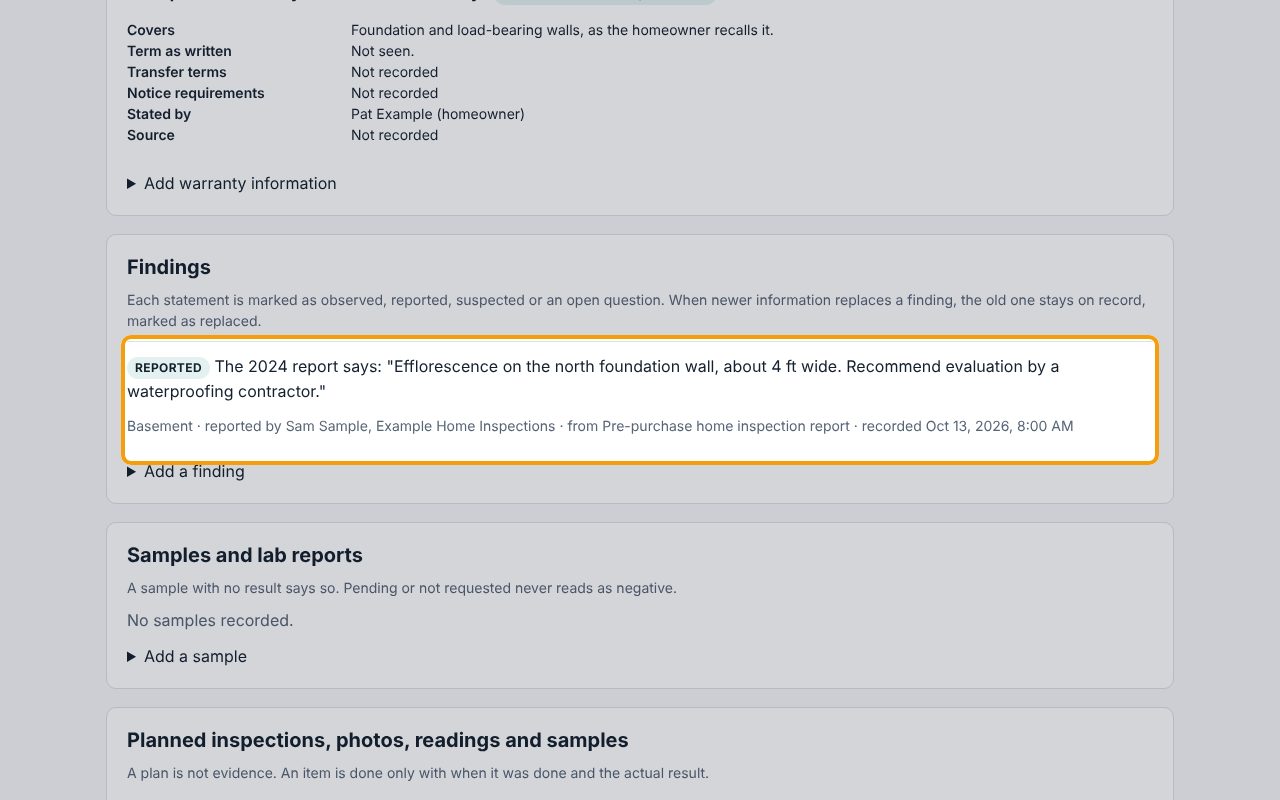
The finding is listed with its kind, so a reader can tell what was reported from what you saw yourself. If newer information replaces it later, the old finding stays on record, marked as replaced.
8Samples, plans and photo links
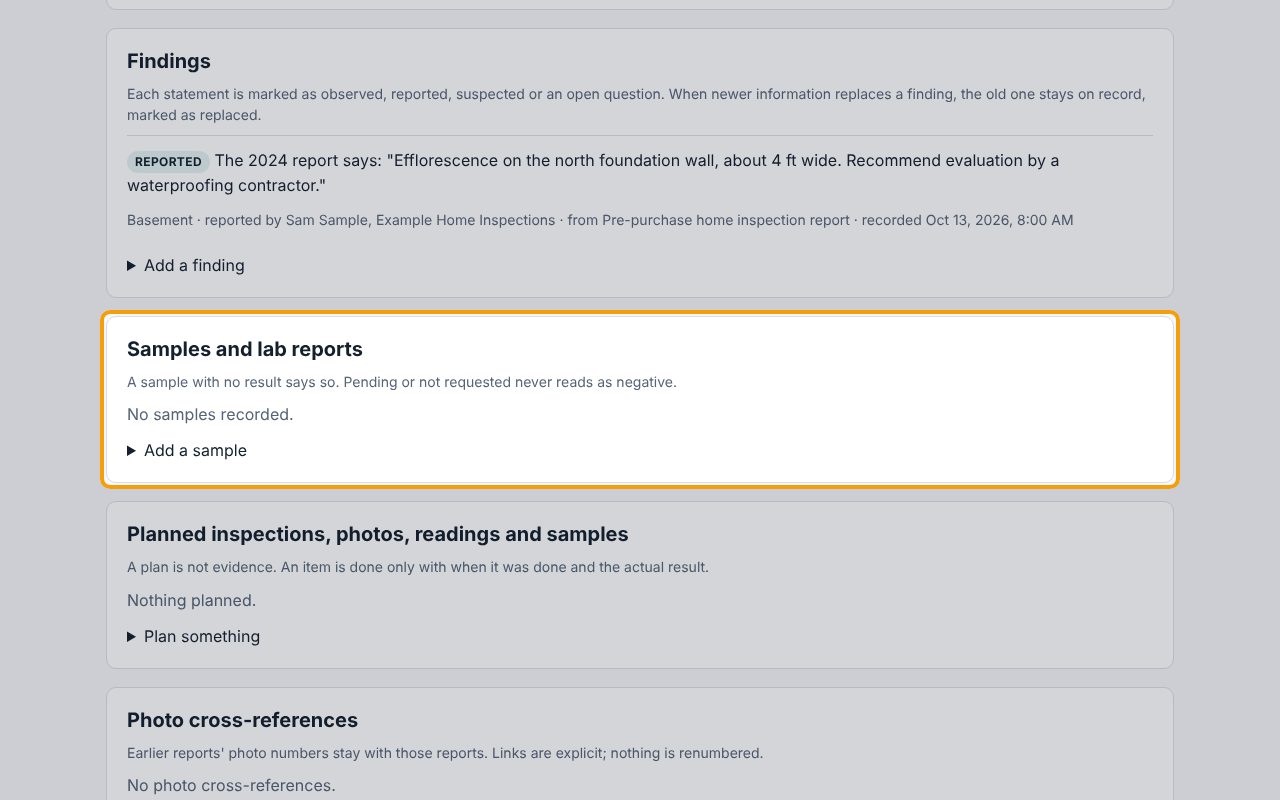
Further down are three more boxes. Samples and lab reports: click Add a sample to record a sample and its status; a sample with no result says so and never reads as negative. Planned inspections, photos, readings and samples: click Plan something for work still to do; a plan is not evidence. Photo cross-references links one of your photos to a photo in an earlier report without renumbering either.
9Where it prints
Everything you recorded prints in its own Property history section of the Carrier report, with each date's source and each finding's kind. The same section is in the Homeowner packet.
If something goes wrong
- "Year built isn't recorded on the Overview tab."
- That line is only a reminder. Year built is kept on the job's Overview tab and is never used to work out the three dates here. Add it there if you know it.
- The document isn't in the File list
- Upload it on the job's Photos & files tab first, then come back and pick it under File. The original stays there, fingerprinted and unchanged.
- I don't know a date, a room or who wrote it
- Leave it blank, or choose Unknown under How sure. Don't work a date out from another one, and don't guess.
- The homeowner asks whether the warranty covers this
- This tab only records what a source says. Coverage, transfer and eligibility are for the warranty provider or an attorney to answer.
What's next
- Build, print and finalize the carrier reportMake the drying report for the carrier or reviewer, print it or save it as a PDF, finalize it, and add a dated addendum if something needs correcting. Also: the homeowner packet. About 10 minutes.
- Complete a mold inspection and issue the reportRecord findings with their next steps and photos, check the inspection report and the client's action plan, issue the report, and add a dated addendum if something changes. About 15 minutes.