Make a moisture map
Draw the rooms, place your reading points and outline the wet area, so a reviewer can see where every reading was taken. About 5 minutes.
Watch it (1:42, no sound)
- A job with its reading points already added on the Drying log tab.
- Optional: a floor plan or sketch uploaded as a photo on Photos & files. Without one you draw on a plain grid.
- A tablet with a stylus or finger works best for drawing; a mouse works too.
Step by step
1Create a map
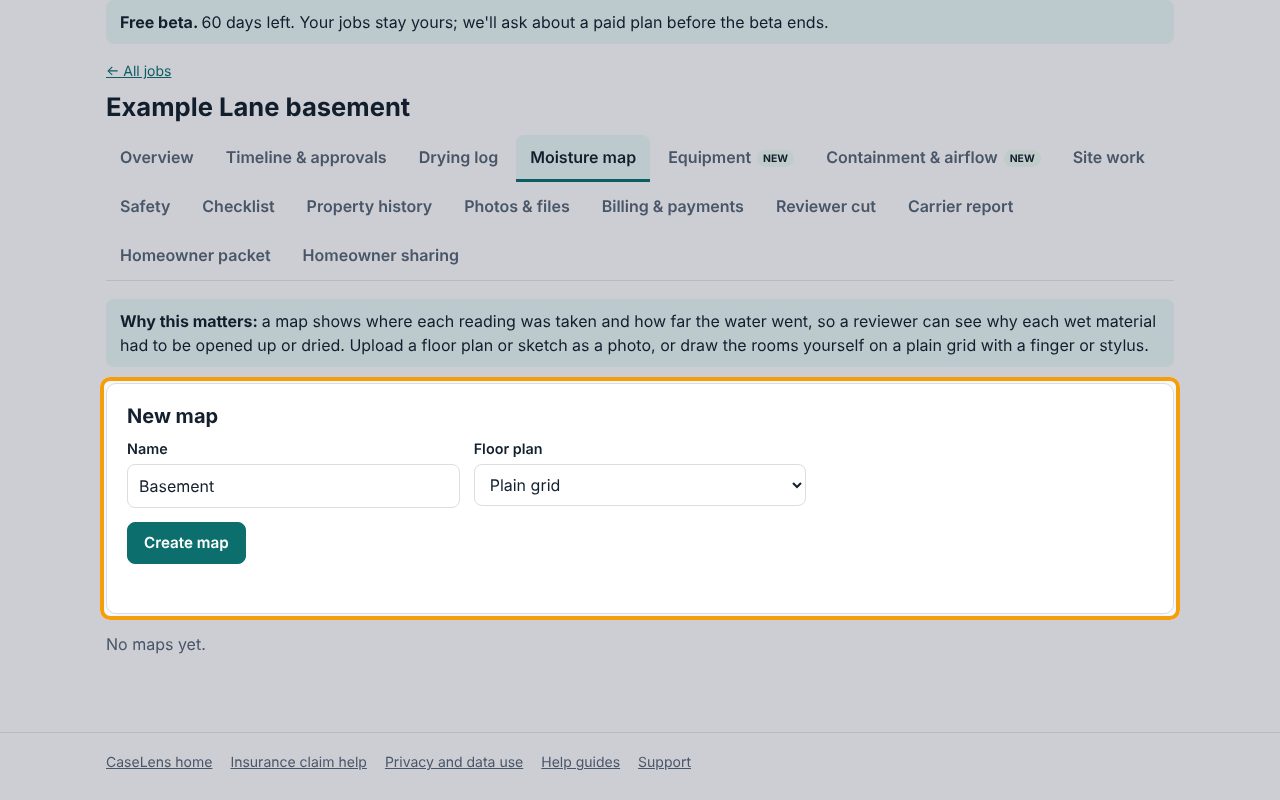
Open the job's Moisture map tab. Under New map, give it a Name (for example the floor), and choose a Floor plan: a plan photo you uploaded, or Plain grid to draw the rooms yourself. Click Create map.
2Draw the walls
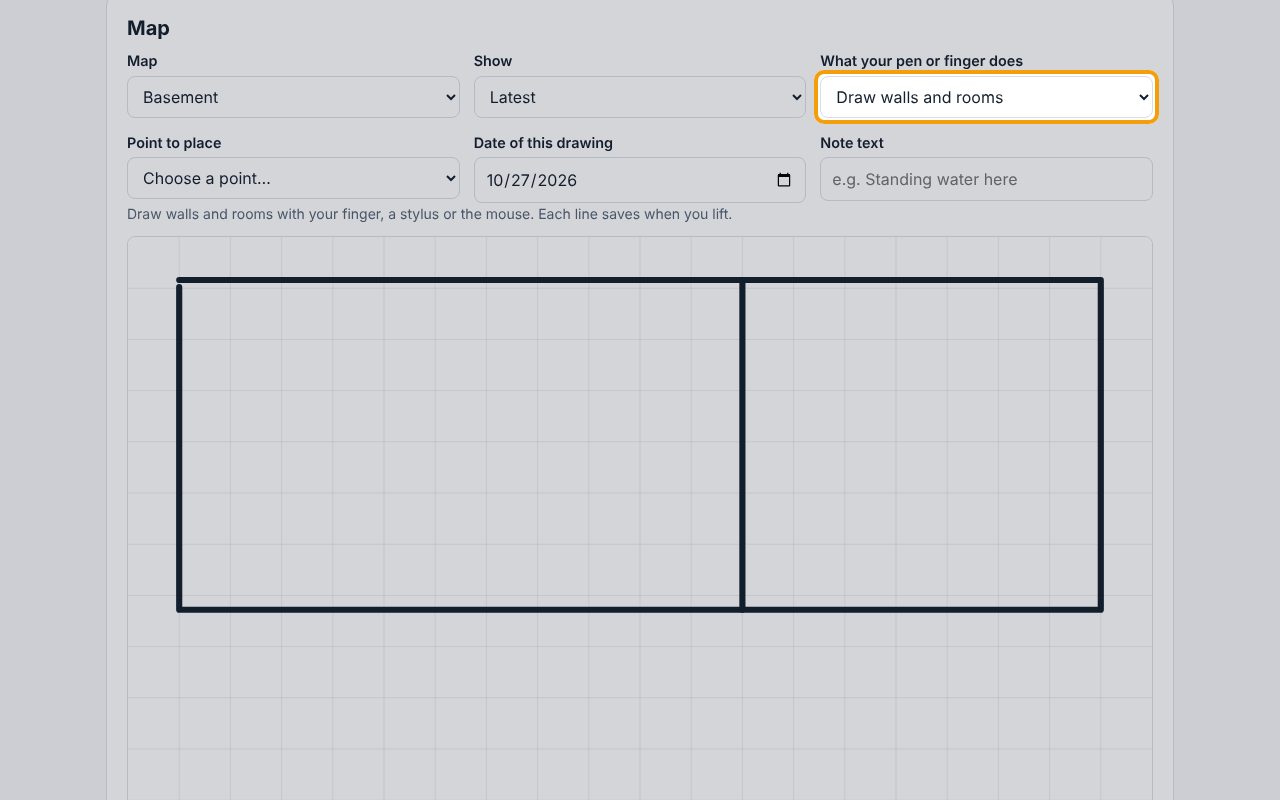
Under What your pen or finger does, choose Draw walls and rooms. Check Date of this drawing, then draw each wall on the plan with your finger, a stylus or the mouse. Each line saves when you lift. Undo last (under the plan) takes back the last line you drew.
3Place your reading points
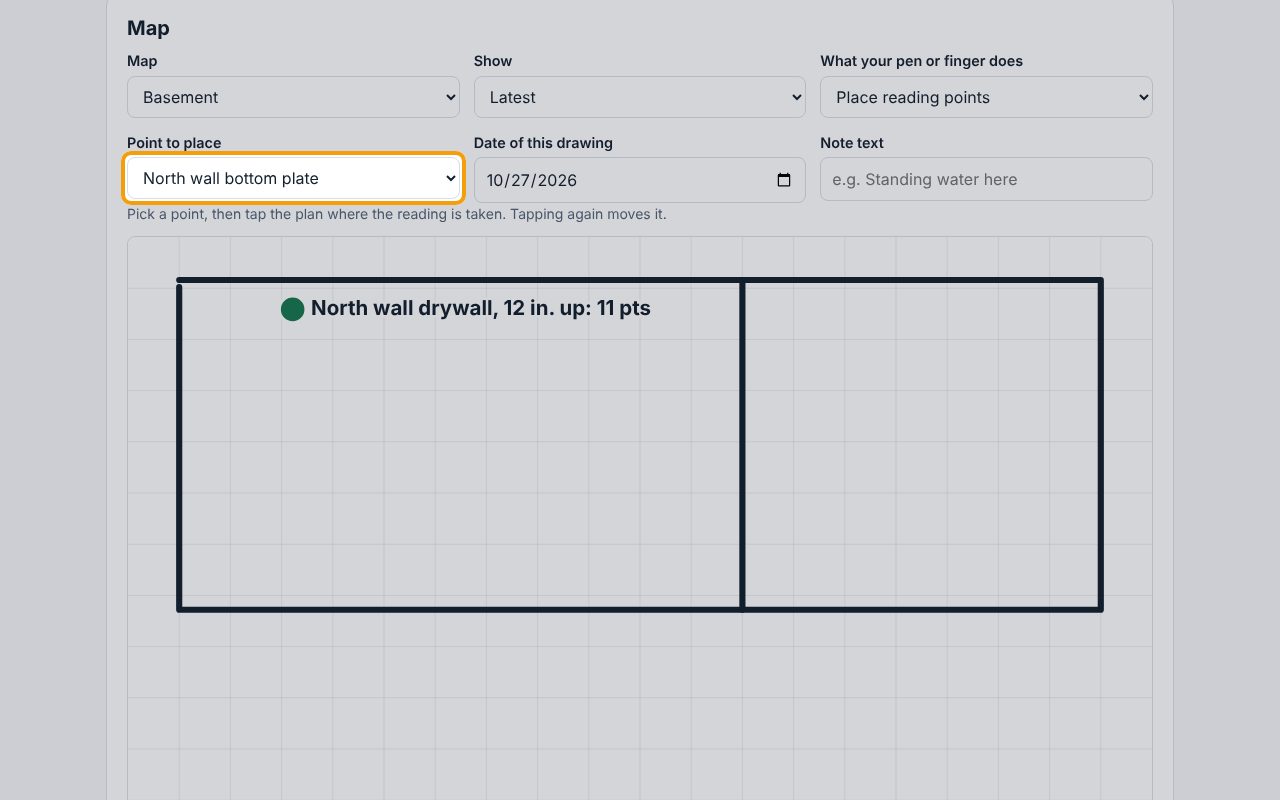
Choose Place reading points, pick a point under Point to place, then tap the plan where you take that reading. It appears with its latest reading: green at or below its dry standard, red above it. Do the same for each point; tapping again moves the chosen point.
4Outline the wet area
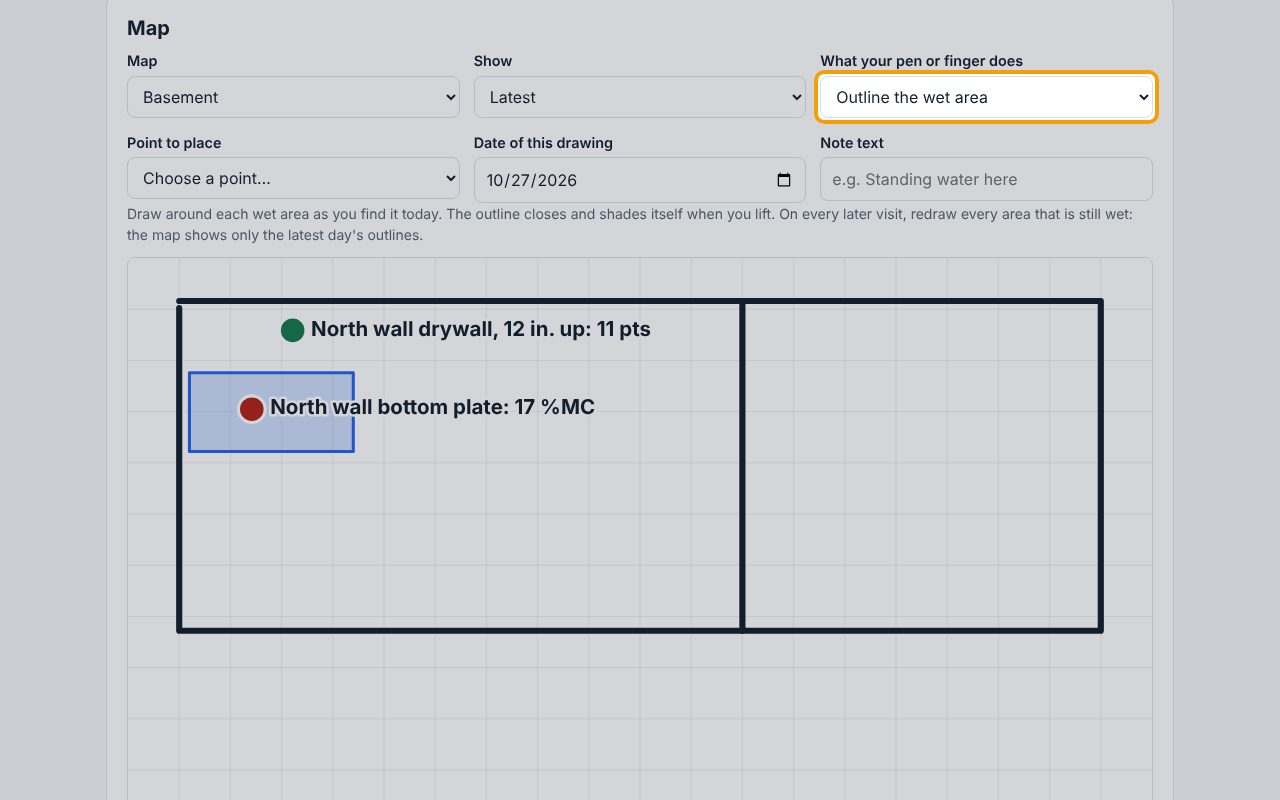
Choose Outline the wet area and draw around each wet area you found today. The outline closes and shades itself when you lift. On every later visit, redraw every area that's still wet: the map shows only the latest day's outlines, and earlier ones stay on the record.
5Add a note
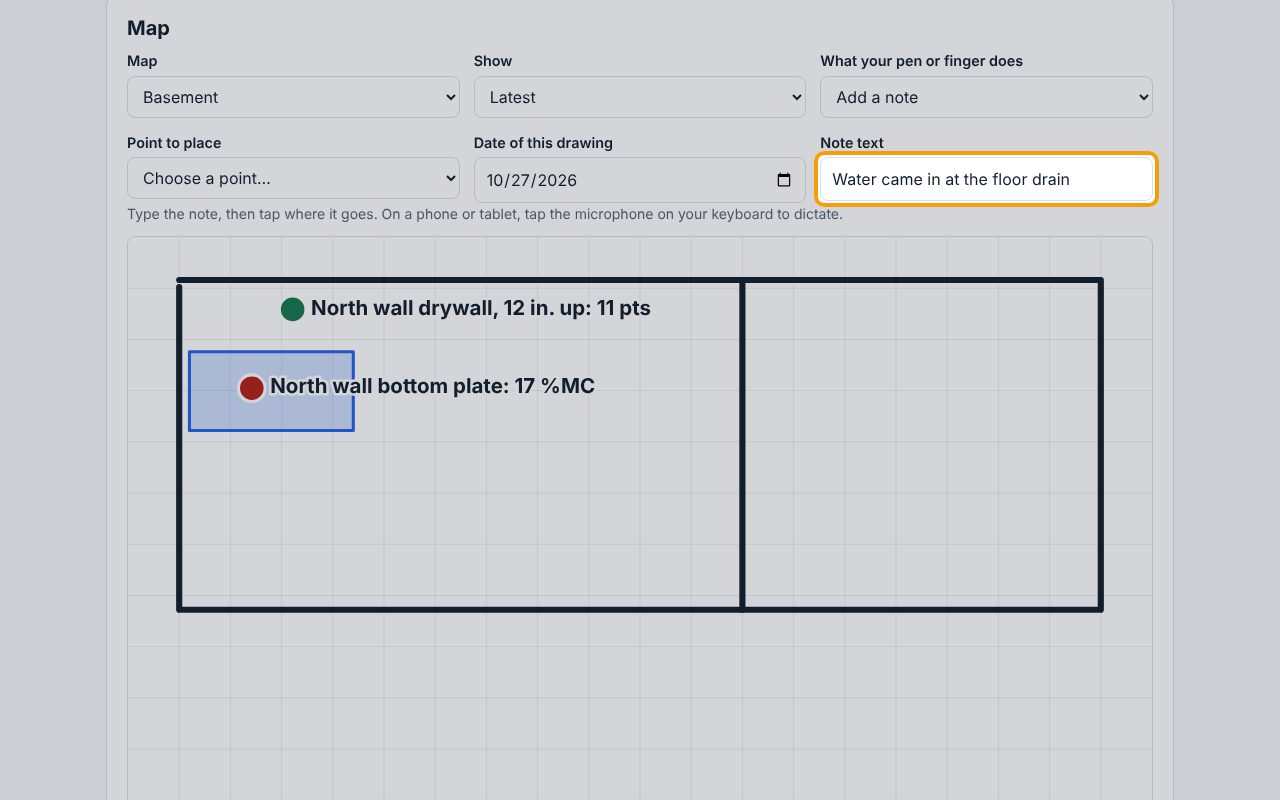
Choose Add a note, type it under Note text, then tap where it goes on the plan (for example where the water came in). The note appears there and the box clears for the next one.
6Your map is saved as you go
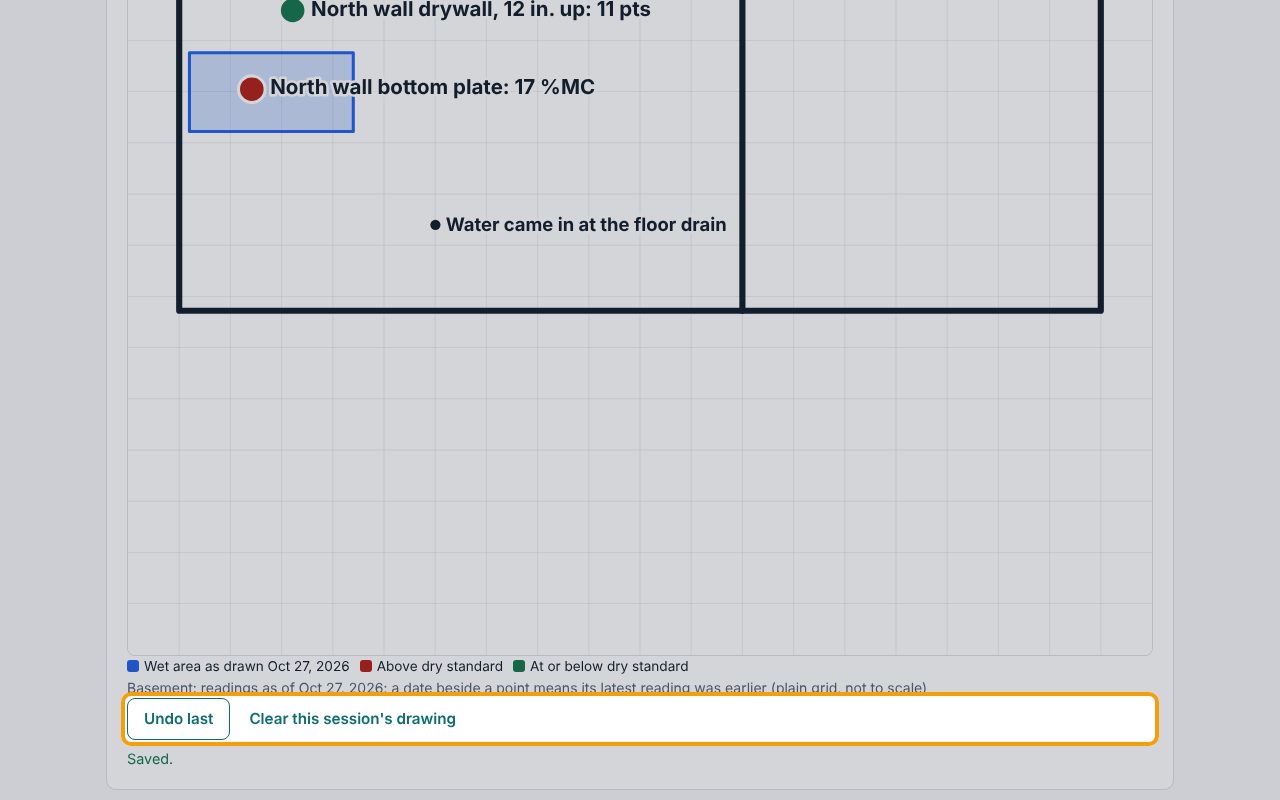
Every wall, point, outline and note saved the moment you drew or tapped it; there's no save button. Undo last and Clear this session's drawing, under the plan, only remove what you drew since you opened the page: earlier days' drawings are part of the job's record.
7Look back at an earlier day
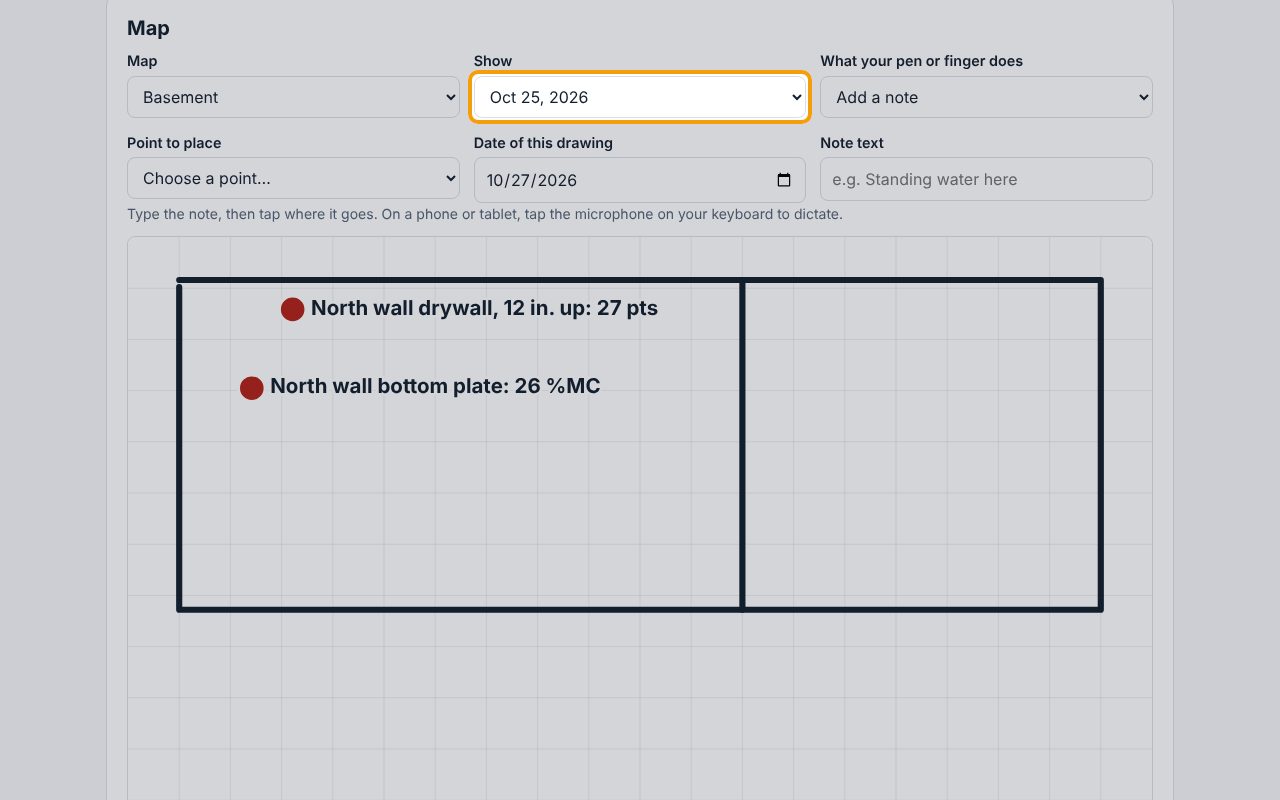
Under Show, pick a date to see each point's reading as it was that day (here both were still red). Choose Latest to go back. The map, with its points and outlines, goes into the carrier report.
If something goes wrong
- "Choose which point you're placing first."
- Pick the point under Point to place before tapping the plan.
- "Type the note first, then tap where it goes."
- Fill in Note text before tapping the plan.
- "Nothing drawn since you opened this page to undo."
- Undo last only takes back what you drew since you opened the page. Earlier drawings are part of the job's record.
- There are no points to place
- Add the reading points on the Drying log tab first, then come back to the map.